Step 4. Scheduling a Patient
Now that the patient is all set up, you can go ahead and schedule them.
*Please Note: Steps 2 and 3 do not need to be completed immediately to schedule, but it will assist you in having all the information. The only thing you need to schedule the patient are the required fields inside the patient creation.
You will want to go to the Schedule tab. Once here, if not already selected, choose the location and team on the right hand side that you will be scheduling the patient on:
 There are two ways you can schedule your patient (depending on how you have your schedule customized).
1. Using Pre-Built Slots
Pre-built slots on the schedule are created in the Slot Builder: See Article
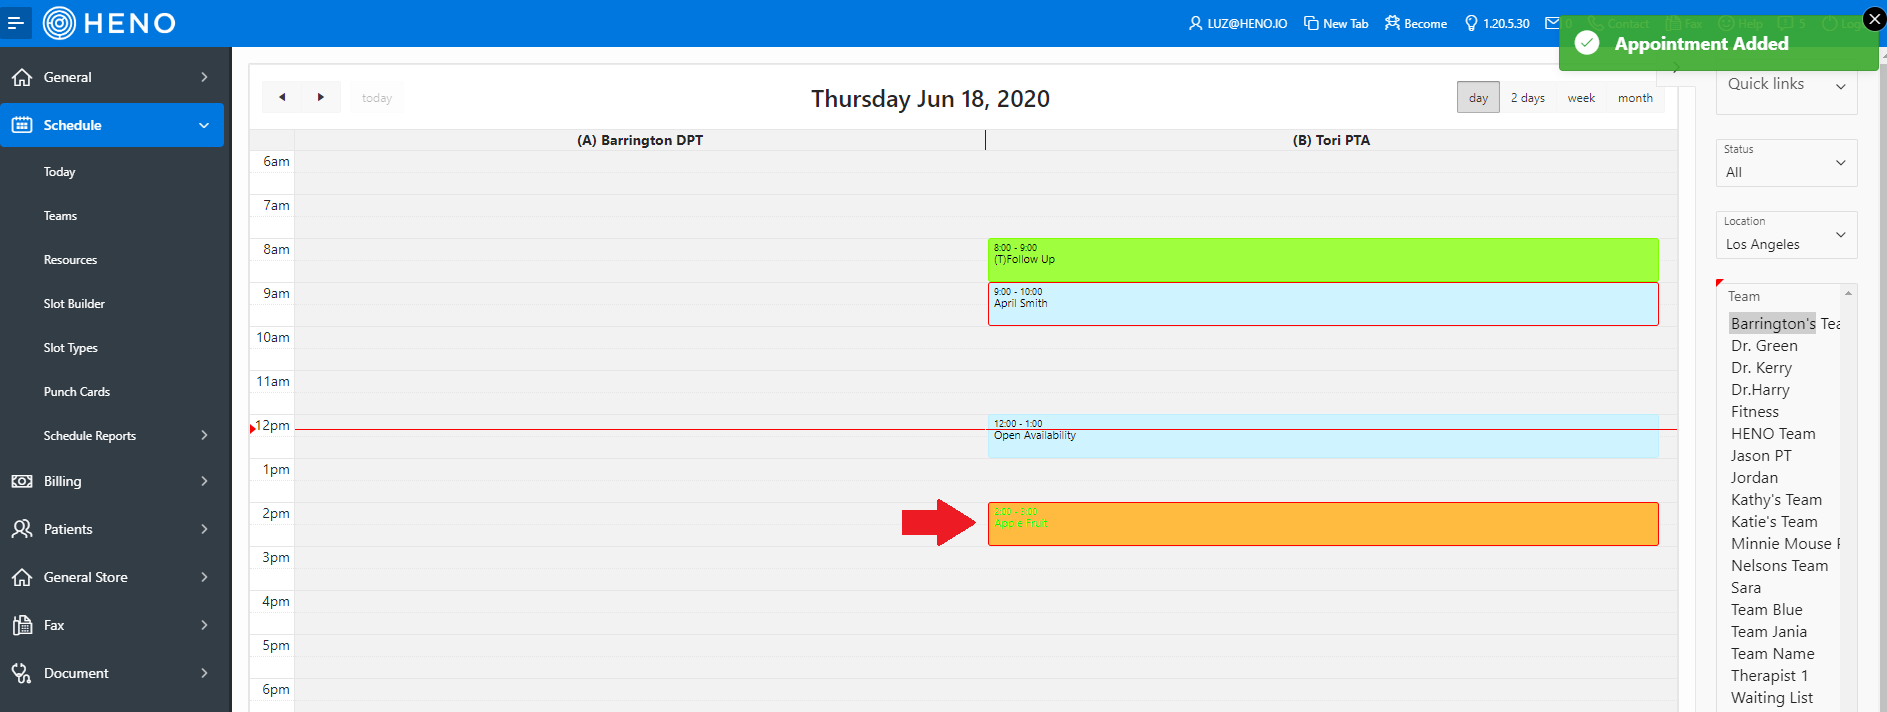
You will click on the slot on the schedule (in this example, my open slot is called "Slot Type"):
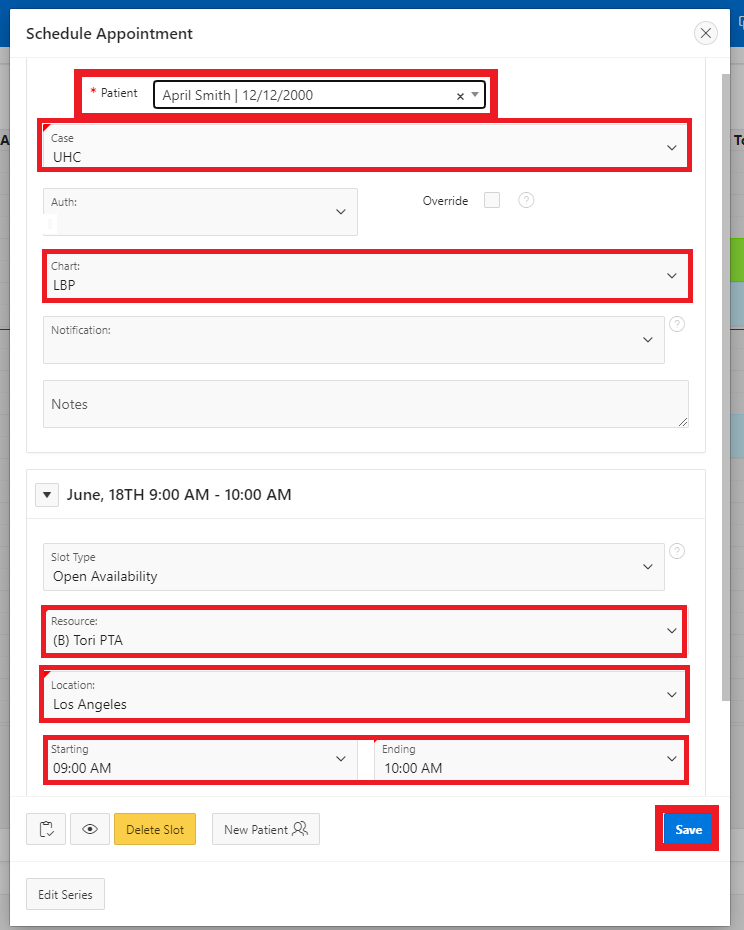
 You will get a pop-up that allows you to Select the Patient, Case & Chart. Fields marked with a red triangle on the left corner are required)
Once you click Save, the patient's name will be in the Slot on the schedule:

2. Creating Slot and Scheduling
If you are using the click schedule without pre-built slots, you will want to click on the time you want to schedule the patient. If you click and drag, you can get the full time range:

You will then get a new page to create the appointment. (This is also where you can create reoccurring appointments as well):
 Select the following to create the the patients appointment:
- Date
- Starting & Ending Time -You can select the starting and ending time. These are in 5 minute increments.
- Slot Type- The type of appointment you are scheduling for the patient.
- Location- Will be associated with the resource (provider) that you are scheduling on.
- Resource- Selected when you click on the schedule
- Patient
Once everything is good here, click on the Create button to add to the schedule