
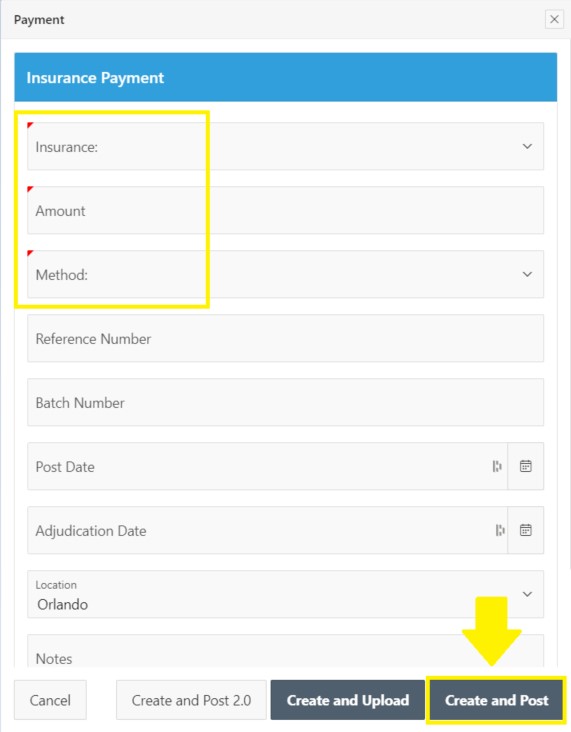
Applying Patient Payments
- Enter Insurance/Payer info
- Enter the Amount
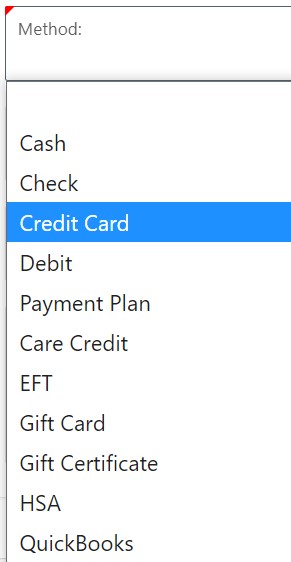
- Select Method of payment
- Click Create and Post
- Red - Patient - this is a drop down where you can select the patient the payment is from
- Orange - Amount - type in the amount of the payment here
- Green - Method - How was the payment taken
- Blue - Reference Number, Clinic Location and Notes - If there is a check number or a transaction number you want to keep tract of and any notes about this payment (such as DOS or what the payment is for)
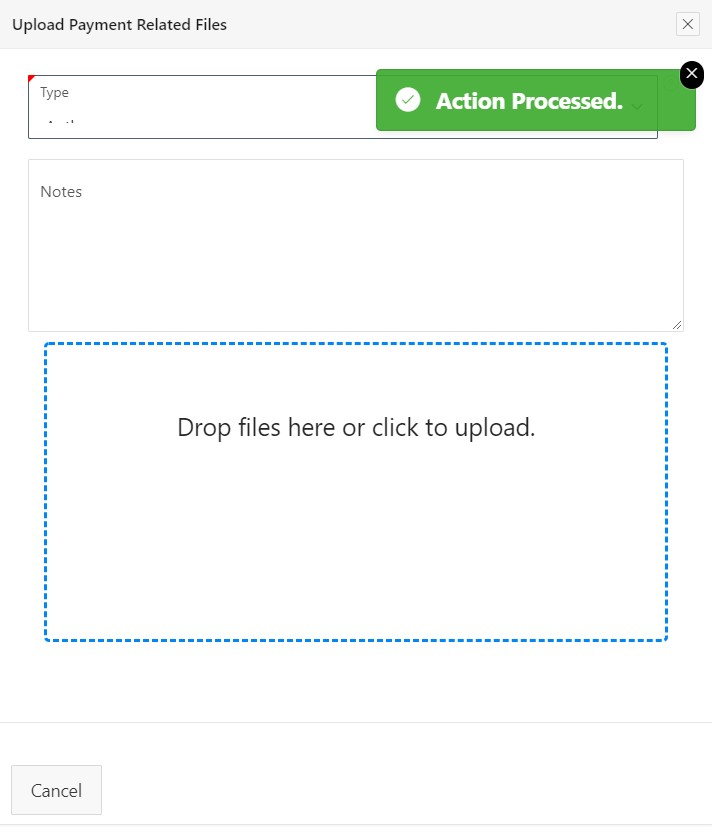
- Yellow - Create and Upload - This will bring you to a new screen to upload a file to attach to this payment (such as a receipt or EOB)
- Purple - Create and Post - This will create the payment and take you to the screen to post a payment to a Claim or General Store order
- Once clicked, it will automatically take you into the payments under Apply | Claims
- Please see below for applying payments
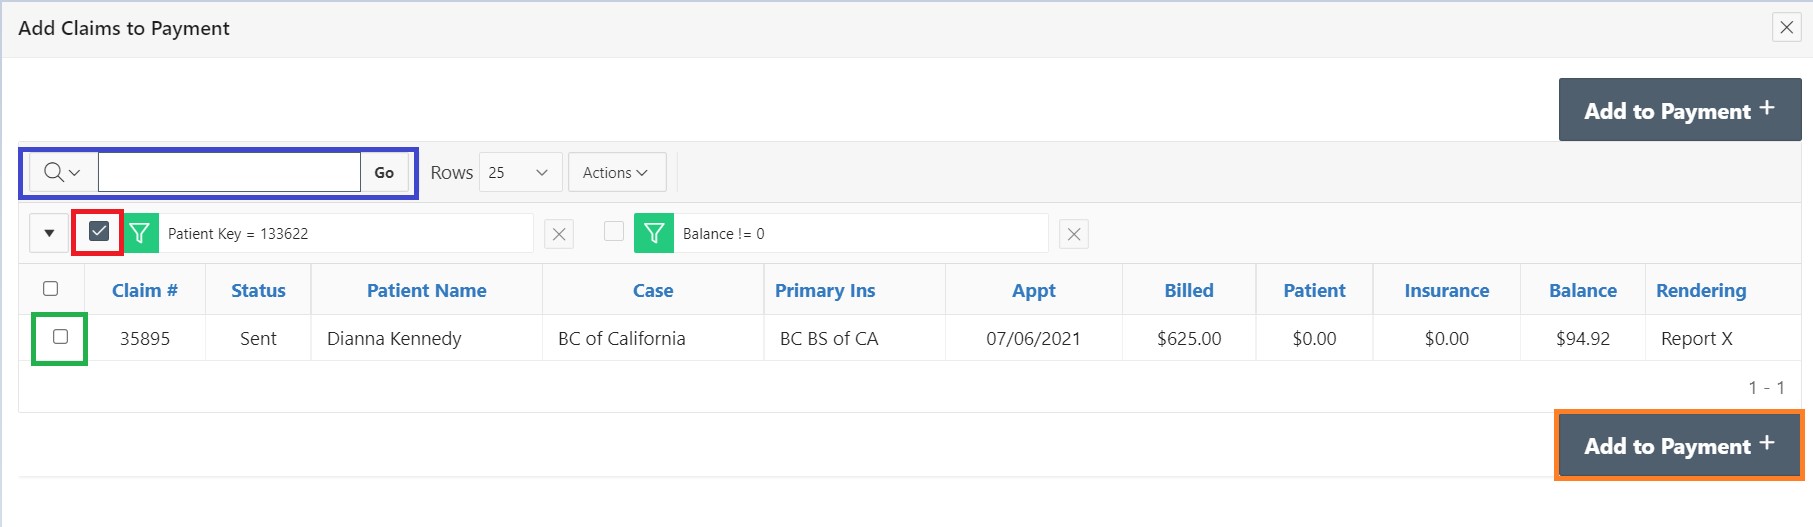
- Green - This will be the claim you are selecting to apply the payment to
- If this payment is being applied to other patients as well:
- Red - uncheck this box to see all patient claims
- Blue - use the search bar to help filter the information
- Orange - Add to Payment - this is all any checked claim box to the payments
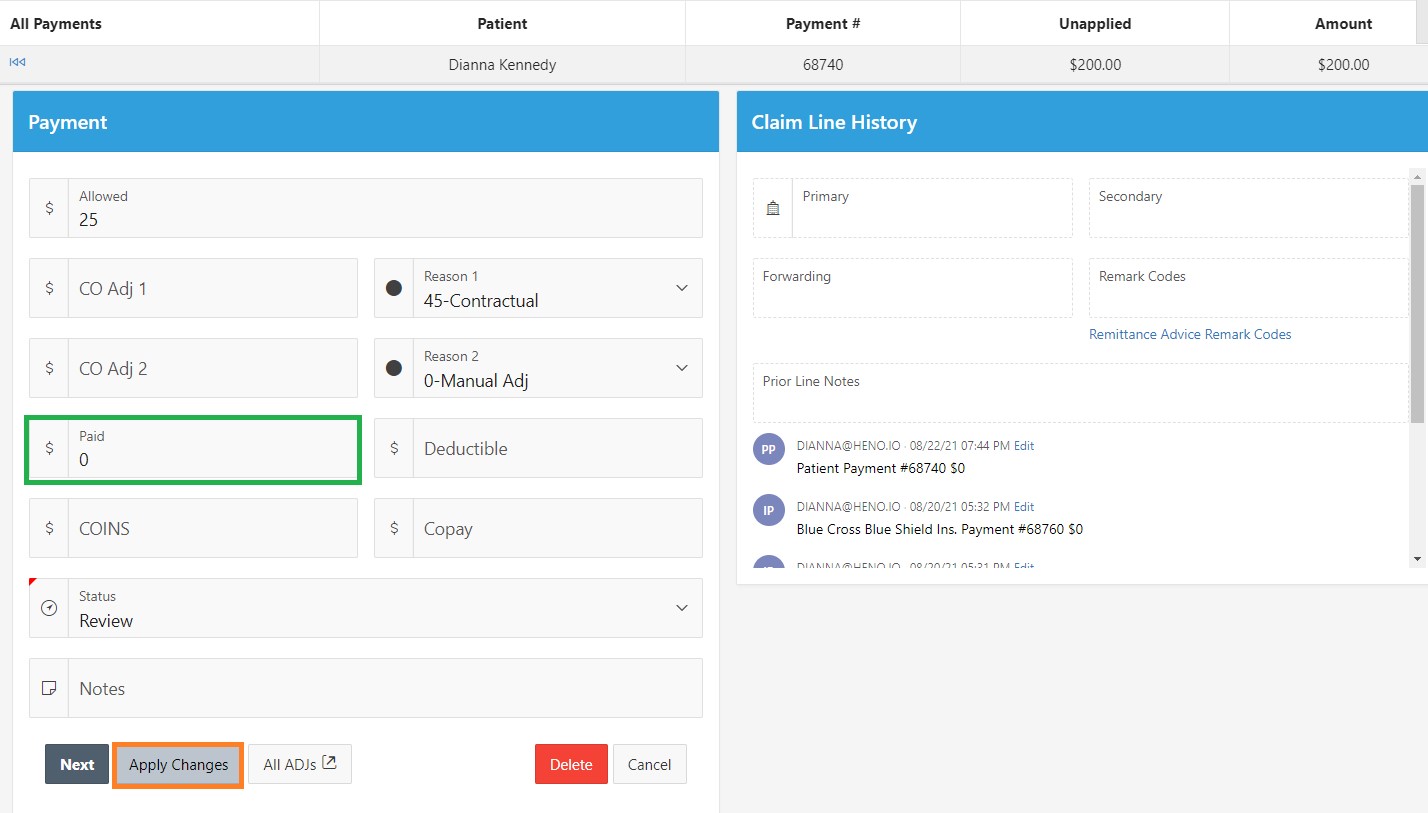
- Green - Paid - this will be the amount you will be applying to this claim
- If there are multiple lines being paid towards, click on the line the payment is being applied to
- Orange - Apply Changes - this will add the paid amount to the line
There are a couple of ways to get to the Patient Payments
Click Billing tab > Payments:

You can Create a Patient Payment under the Insurance screen:

Click Insurance Payment:

Click Insurance Payment:

Create Patient Payment (Collect new)
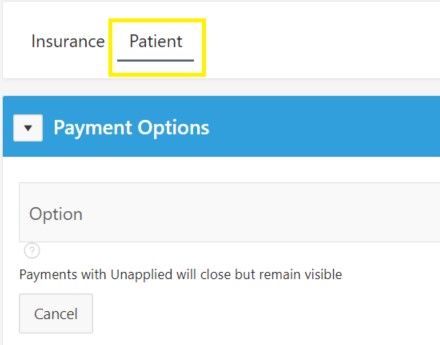
Switch to Patient tab at the top:
Next:

Switch to Patient tab at the top:

Next:


Editing a Payment
If you click on the Payment number, it will pull you into the payment with information
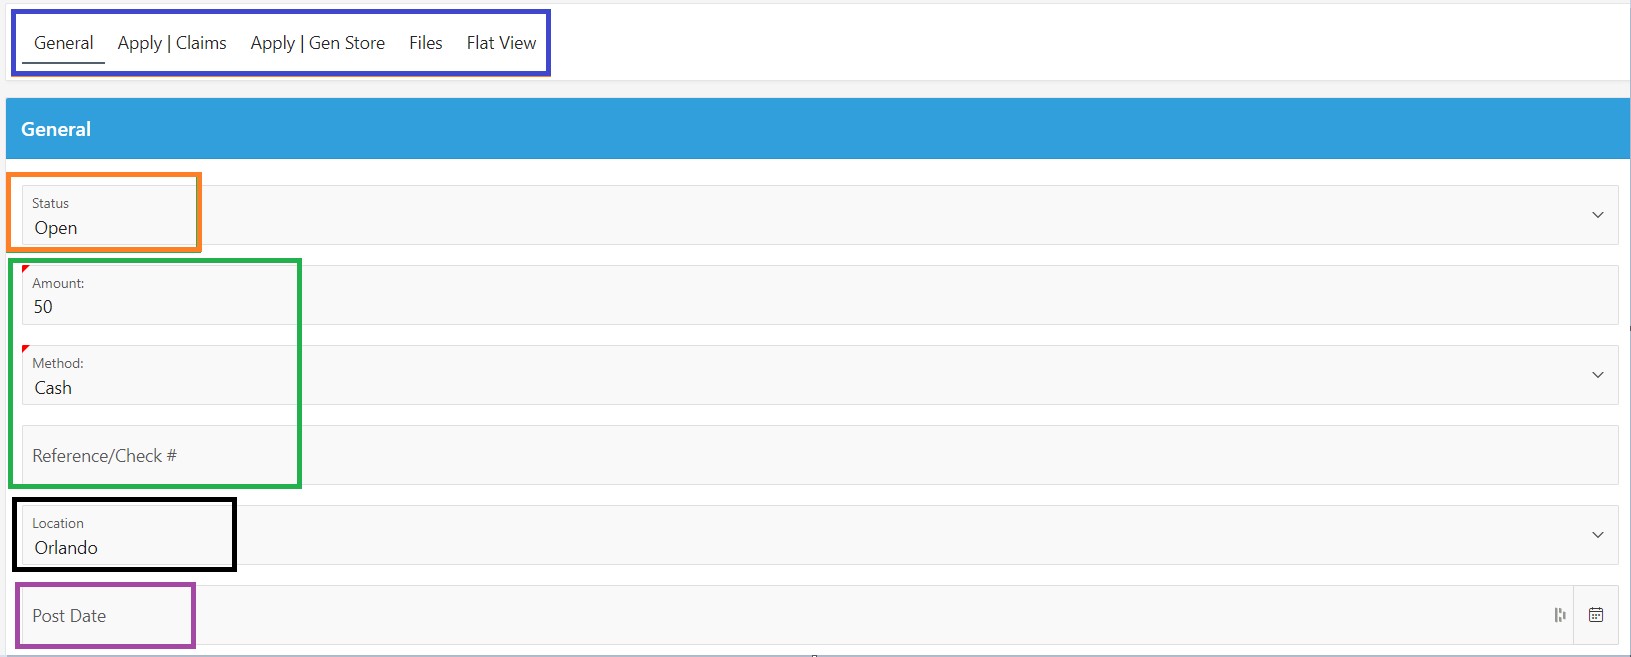
Blue - Menu Bar - this will allow you to toggle through different parts of the payment
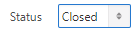
Orange - Status - this is the status of the payment. Open - payment is still being applied. Closed- payment is applied
Green - Amount/Method/Reference - this is the information that was placed in the payment as shown in the upper section. You can edit the information here if needed
Black - Clinic location
Purple - Post Date - the date this was posted to the patient. It will default to the date the payment is created
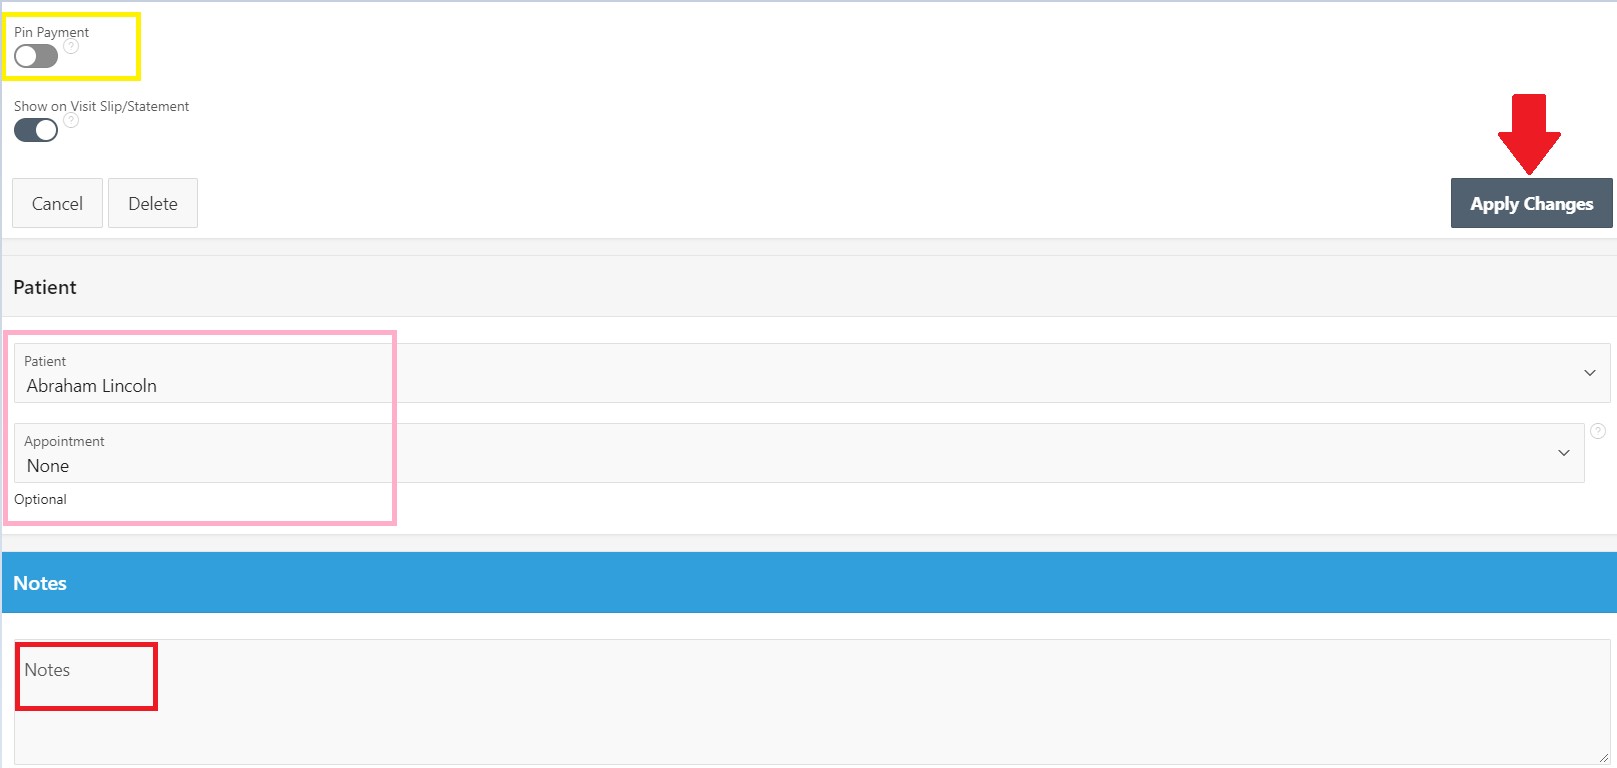
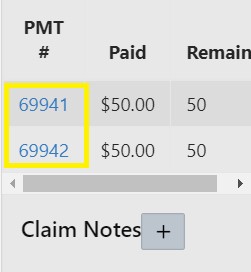
Yellow - Pinned Payment - please see article Pinned Payments for more information
Pink - Patient/Appointment - this will show you the patient the payment is applied to and you can assign the payment to a specific appointment
Red - Notes - this will allow you to edit any notes that have been added or give more information about the payment, If you change anything on this screen, make sure to Apply Changes
If you click on the Payment number, it will pull you into the payment with information


Blue - Menu Bar - this will allow you to toggle through different parts of the payment
Orange - Status - this is the status of the payment. Open - payment is still being applied. Closed- payment is applied
Green - Amount/Method/Reference - this is the information that was placed in the payment as shown in the upper section. You can edit the information here if needed
Black - Clinic location
Purple - Post Date - the date this was posted to the patient. It will default to the date the payment is created

Yellow - Pinned Payment - please see article Pinned Payments for more information
Pink - Patient/Appointment - this will show you the patient the payment is applied to and you can assign the payment to a specific appointment
Red - Notes - this will allow you to edit any notes that have been added or give more information about the payment, If you change anything on this screen, make sure to Apply Changes
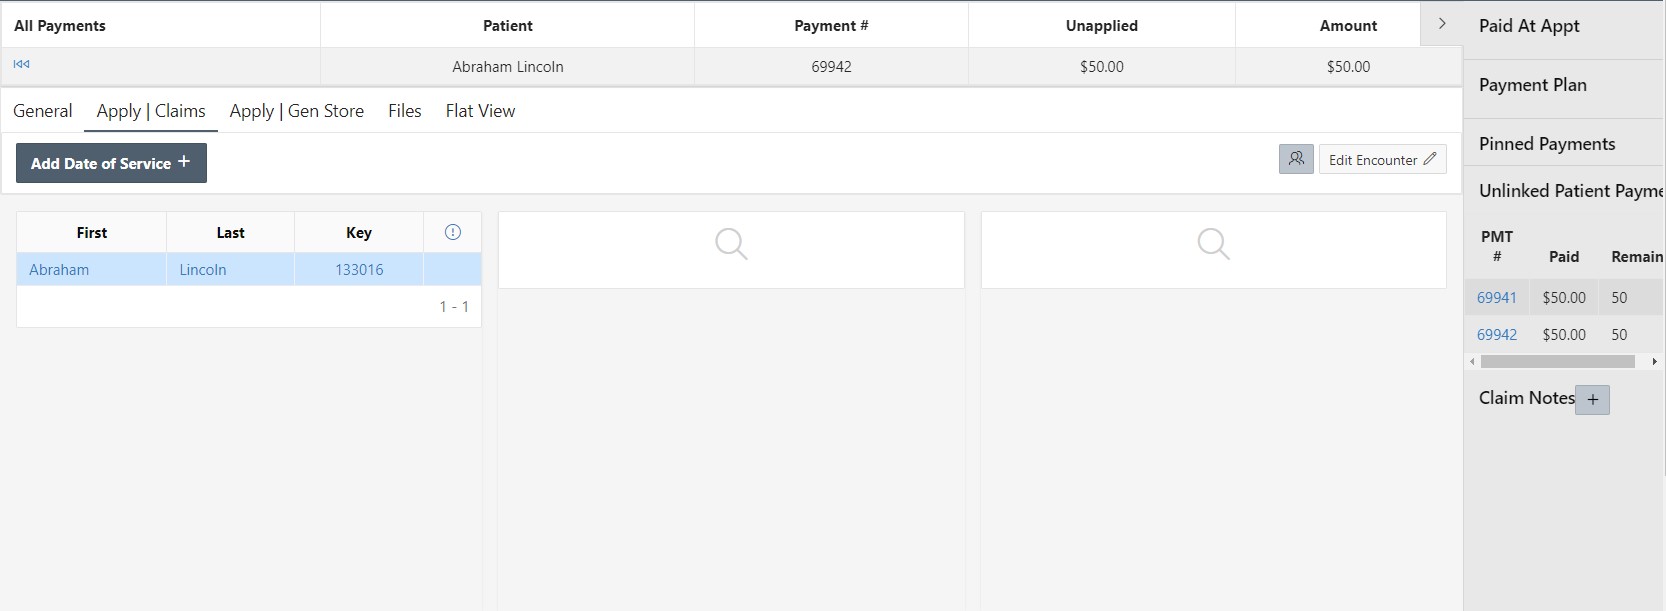
Applying Payment to a Claim
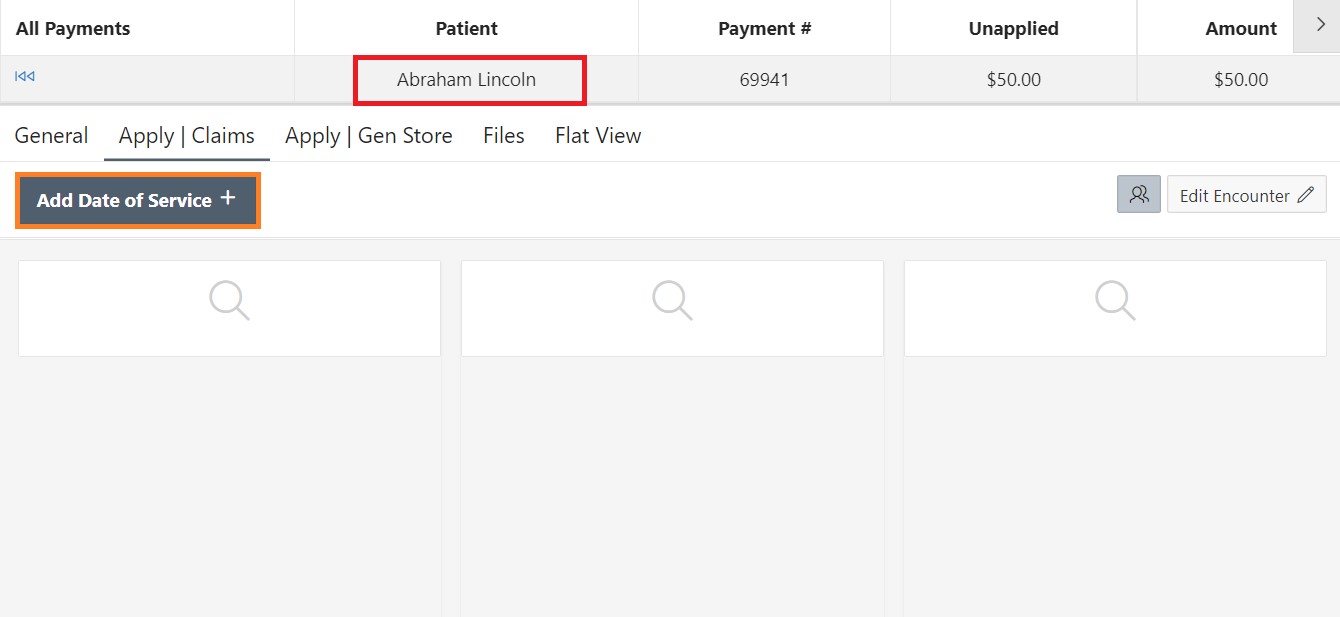
In the Apply | Claims tab, the patients name will appear at the top
To add dates of service, click on the Add Date of Service:
This will give you a pop-up:
Once the payment has been added, click on the Date of Service you are adding a payment to. A new column on the right will show up to apply payment to:

If this is the end of the payment you can go back to the General Tab and change the status to Closed:
In the Apply | Claims tab, the patients name will appear at the top
To add dates of service, click on the Add Date of Service:

This will give you a pop-up:

Once the payment has been added, click on the Date of Service you are adding a payment to. A new column on the right will show up to apply payment to:


If this is the end of the payment you can go back to the General Tab and change the status to Closed:
