
Communication Rules
***With our September 2022 Release, You can now select two new rule types! You can now create a rule for all your patients that are within the missing in schedule report, as well as by Chart, Visit count, and Status! You can also now have multiple emails for patients within your rule to release within a drip style!***
n this article we will discuss how to start with your marketing outreach by setting up communication rules.
How to Get Started:
To get Started on Heno's Communication Rules, there are 2 (two) steps that must be completed prior to setting up your first email
- Email support@heno.io with a VALID e-mail address that recipients can reply to. We recommend using a company domain and NOT a personal GMAIL/yahoo.com type address.
- Add this SPF TXT record on their domain: v=spf1 include:rp.oracleemaildelivery.com ~all
- Business Microsoft SPF Set up
- Business Gmail SPF Set up
- If you have a different mail server, please Google "[Server Name] SPF Set up"
There are two privileges that have been added for this section of Marketing. These can be set up inside the Admin -> User
| Marketing: Comm. Rules - Manage | This will allow the user to access the new email feature to view, edit & create new emails. |
| Marketing: Comm. Rules - View | This will allow the user to view the new email feature ONLY. |
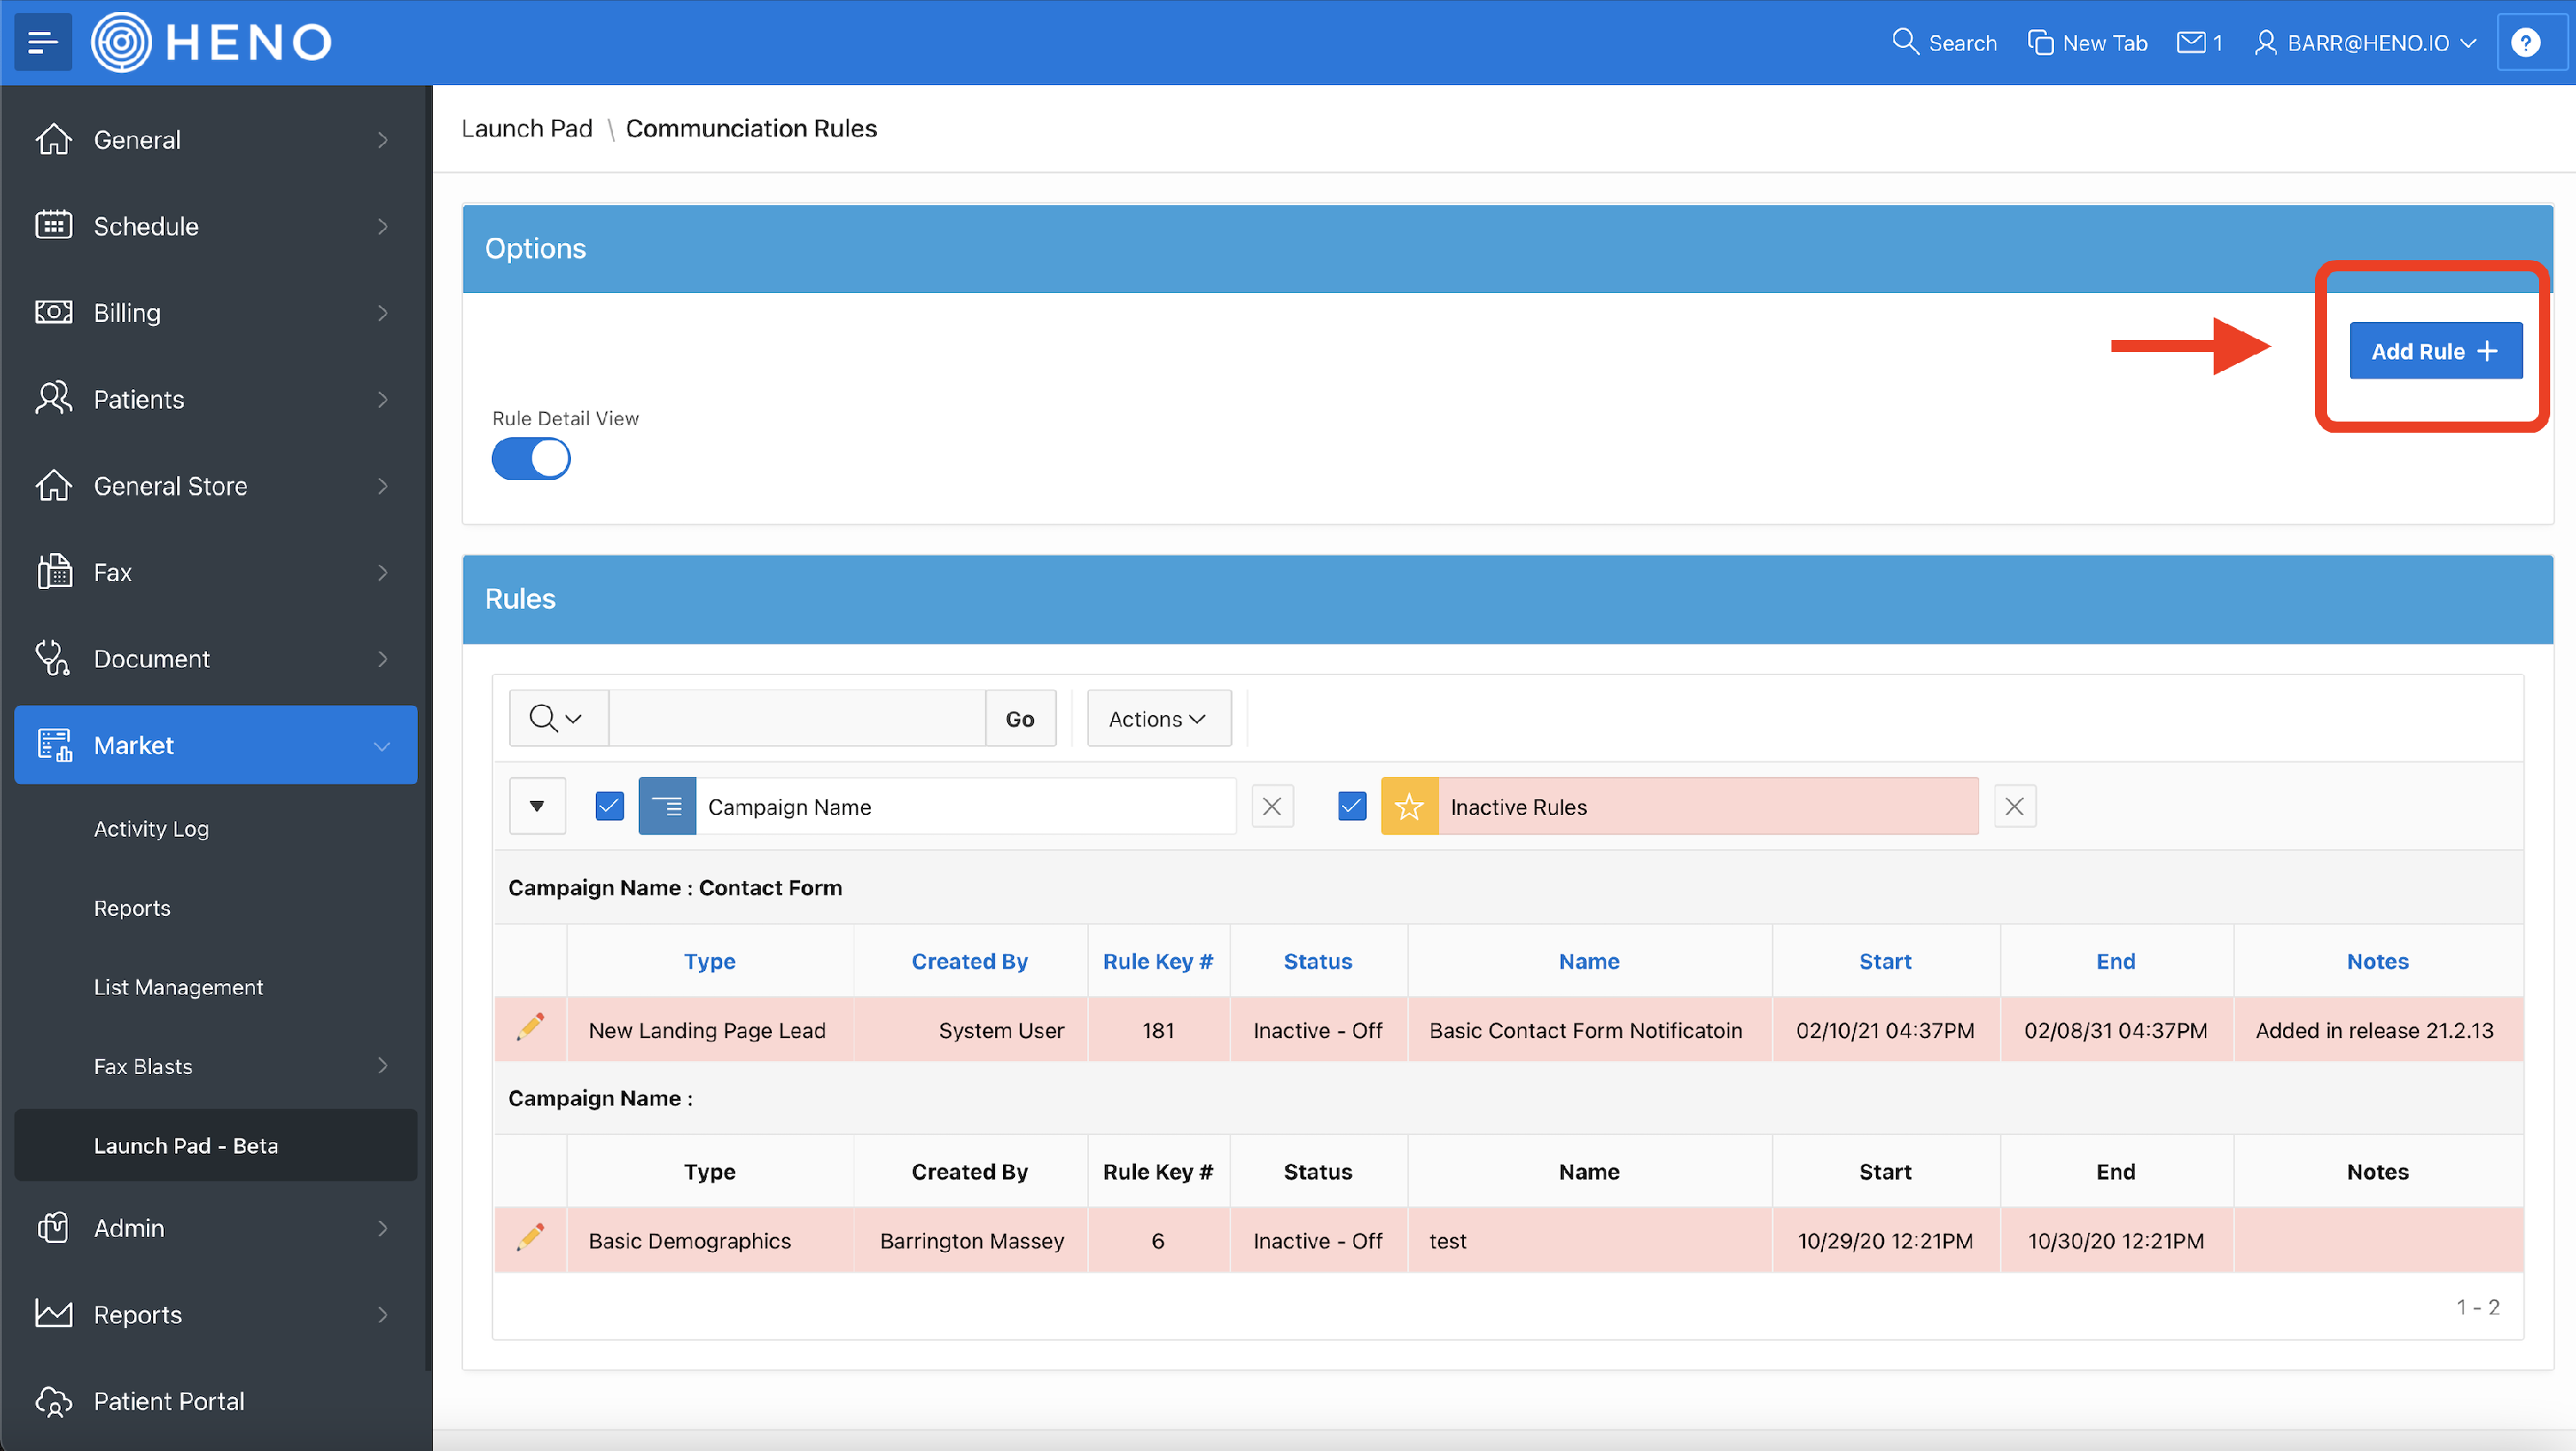
To start creating your Communication Rules from the launch pad click onto the "Communication Rules" tile.
 Now inside of the Communication Rules lets set up our first folder:
A pop-up window will appear that we can name to our own preference:
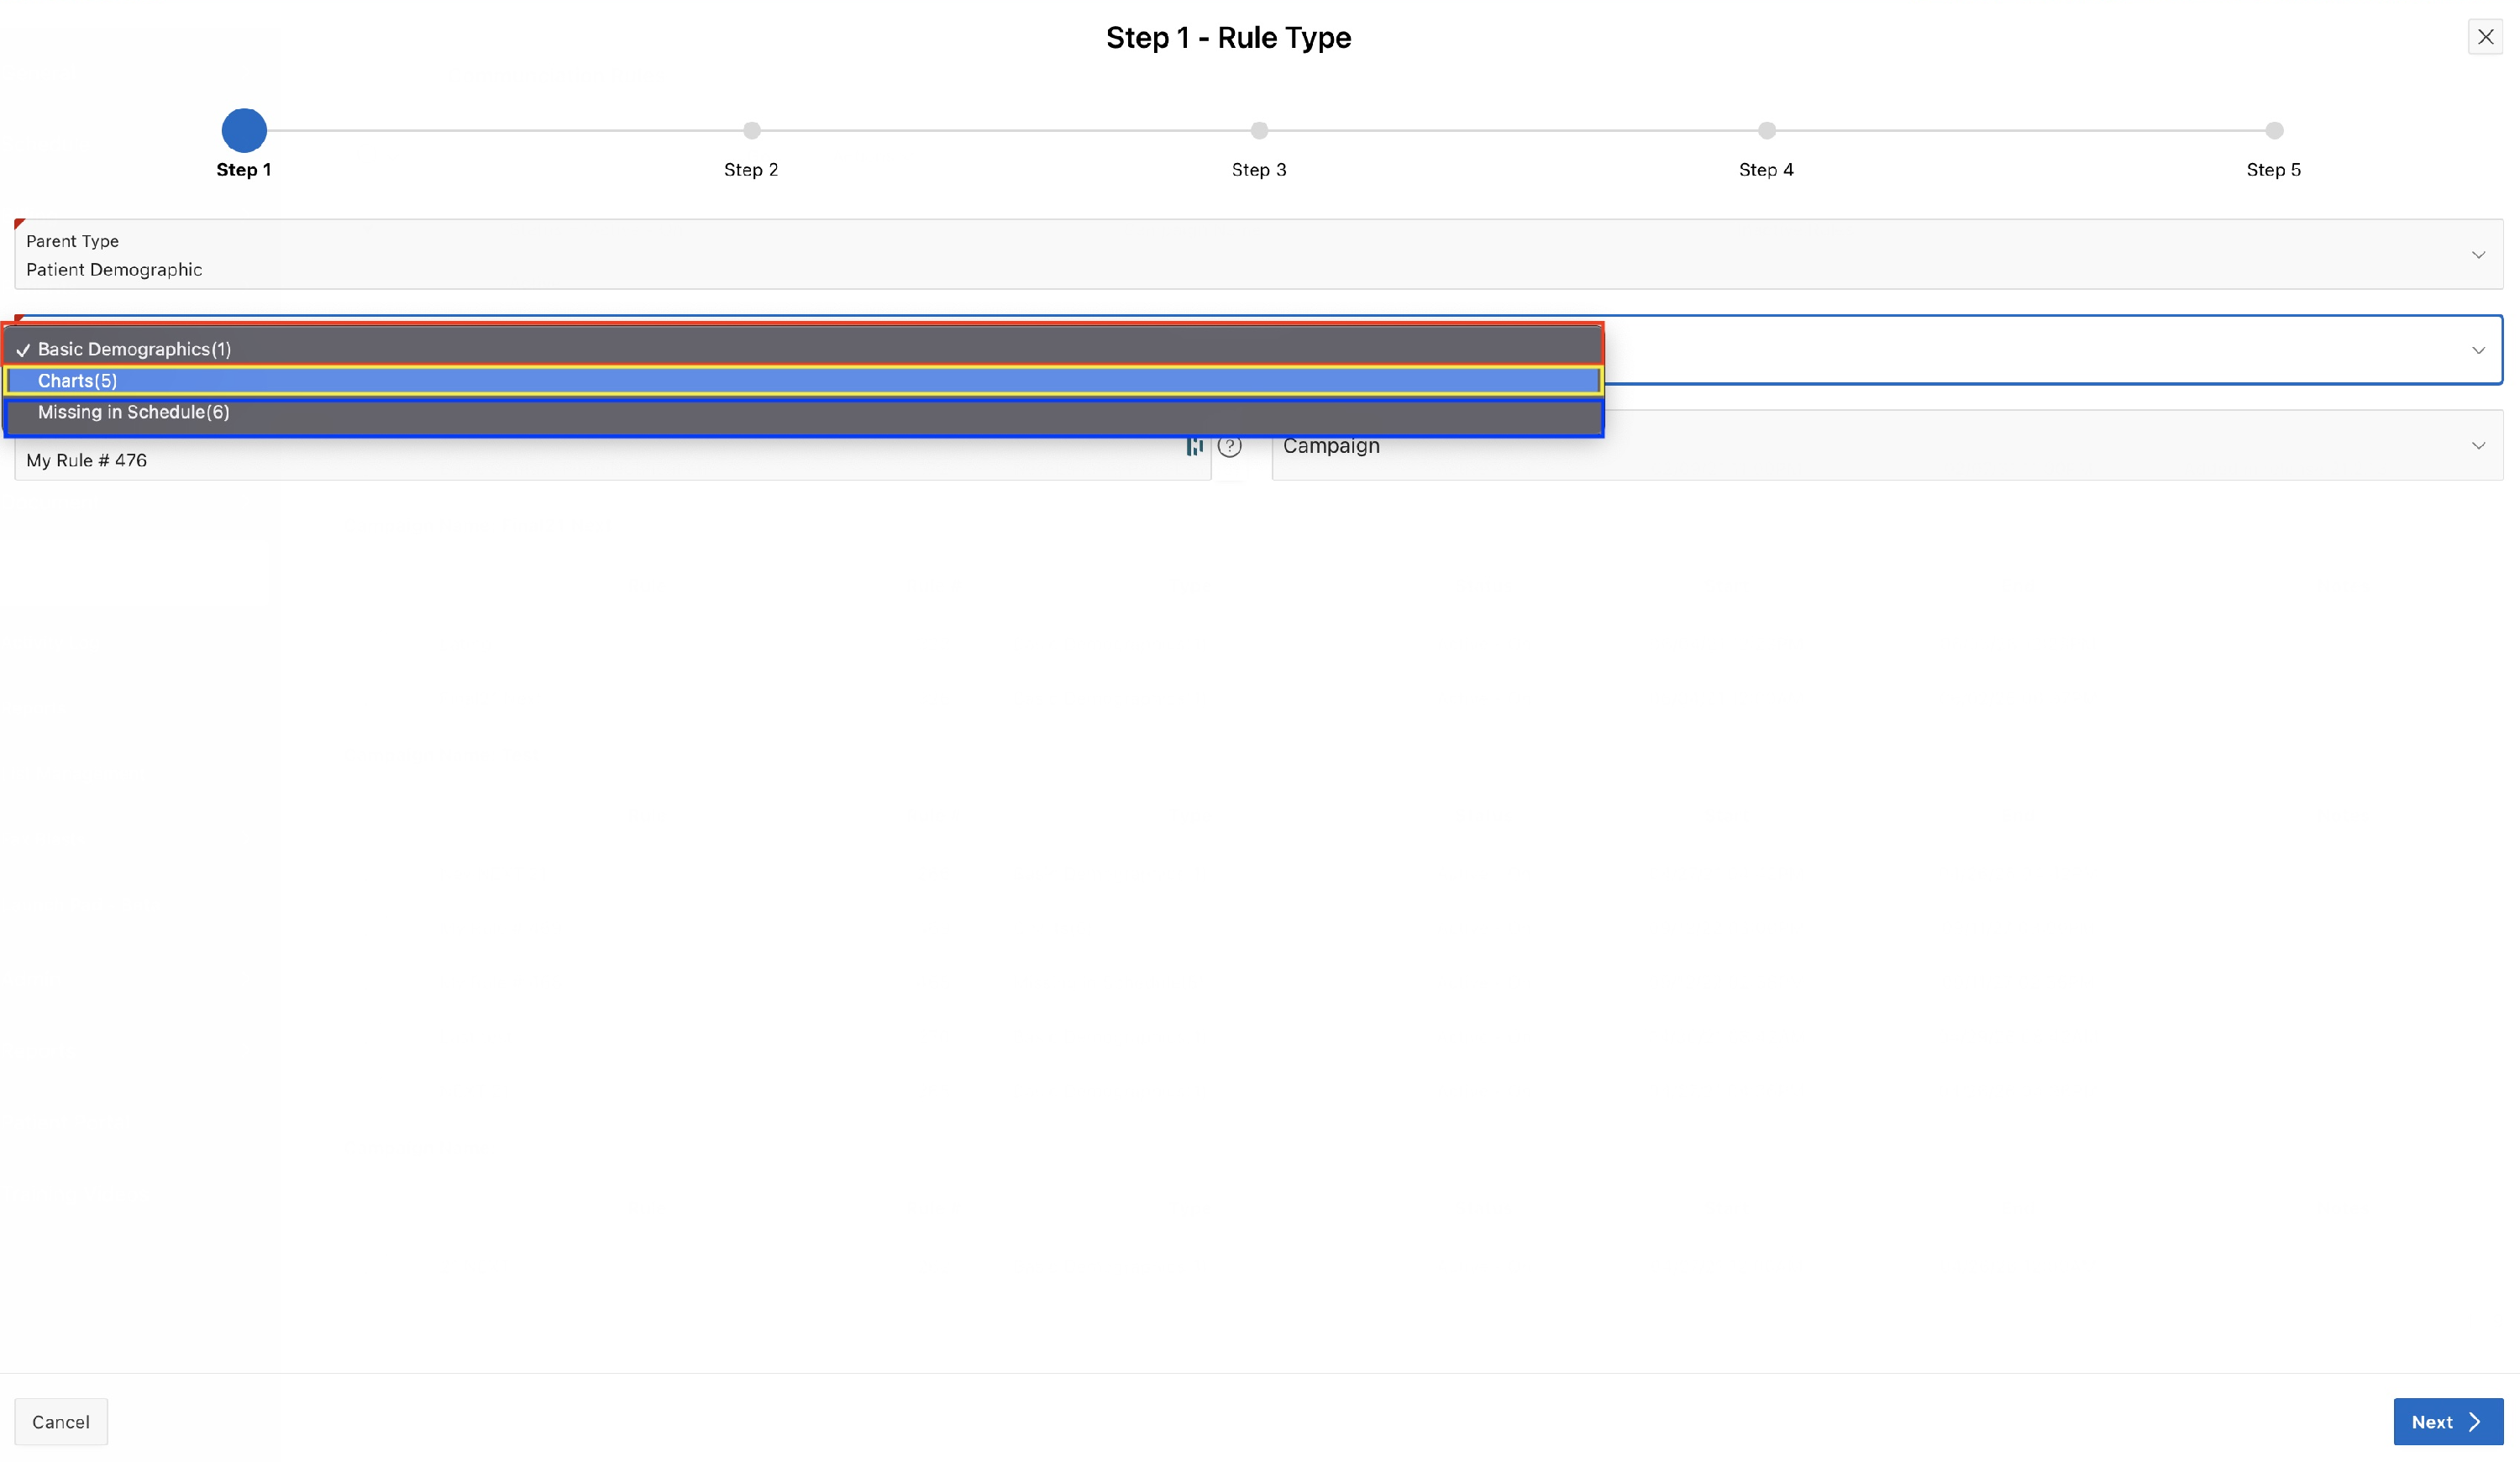
When you create the new rule you can name your rule and select the campaign you would like it to be associated, there are three to choose from:
Missing in schedule: Will associate all patients within the Missing in Schedule report.
Chart, Status, Visit count: Will associate all patients with a selected chart type, Visit count, and/or Status.
Basic Demographics: Will pull all patients under a certain sub status.
Choose if you would like E-Mail and Contact Log

Next is to set up your Start and End date/time, the initial set up is in place for a 5 year rule:

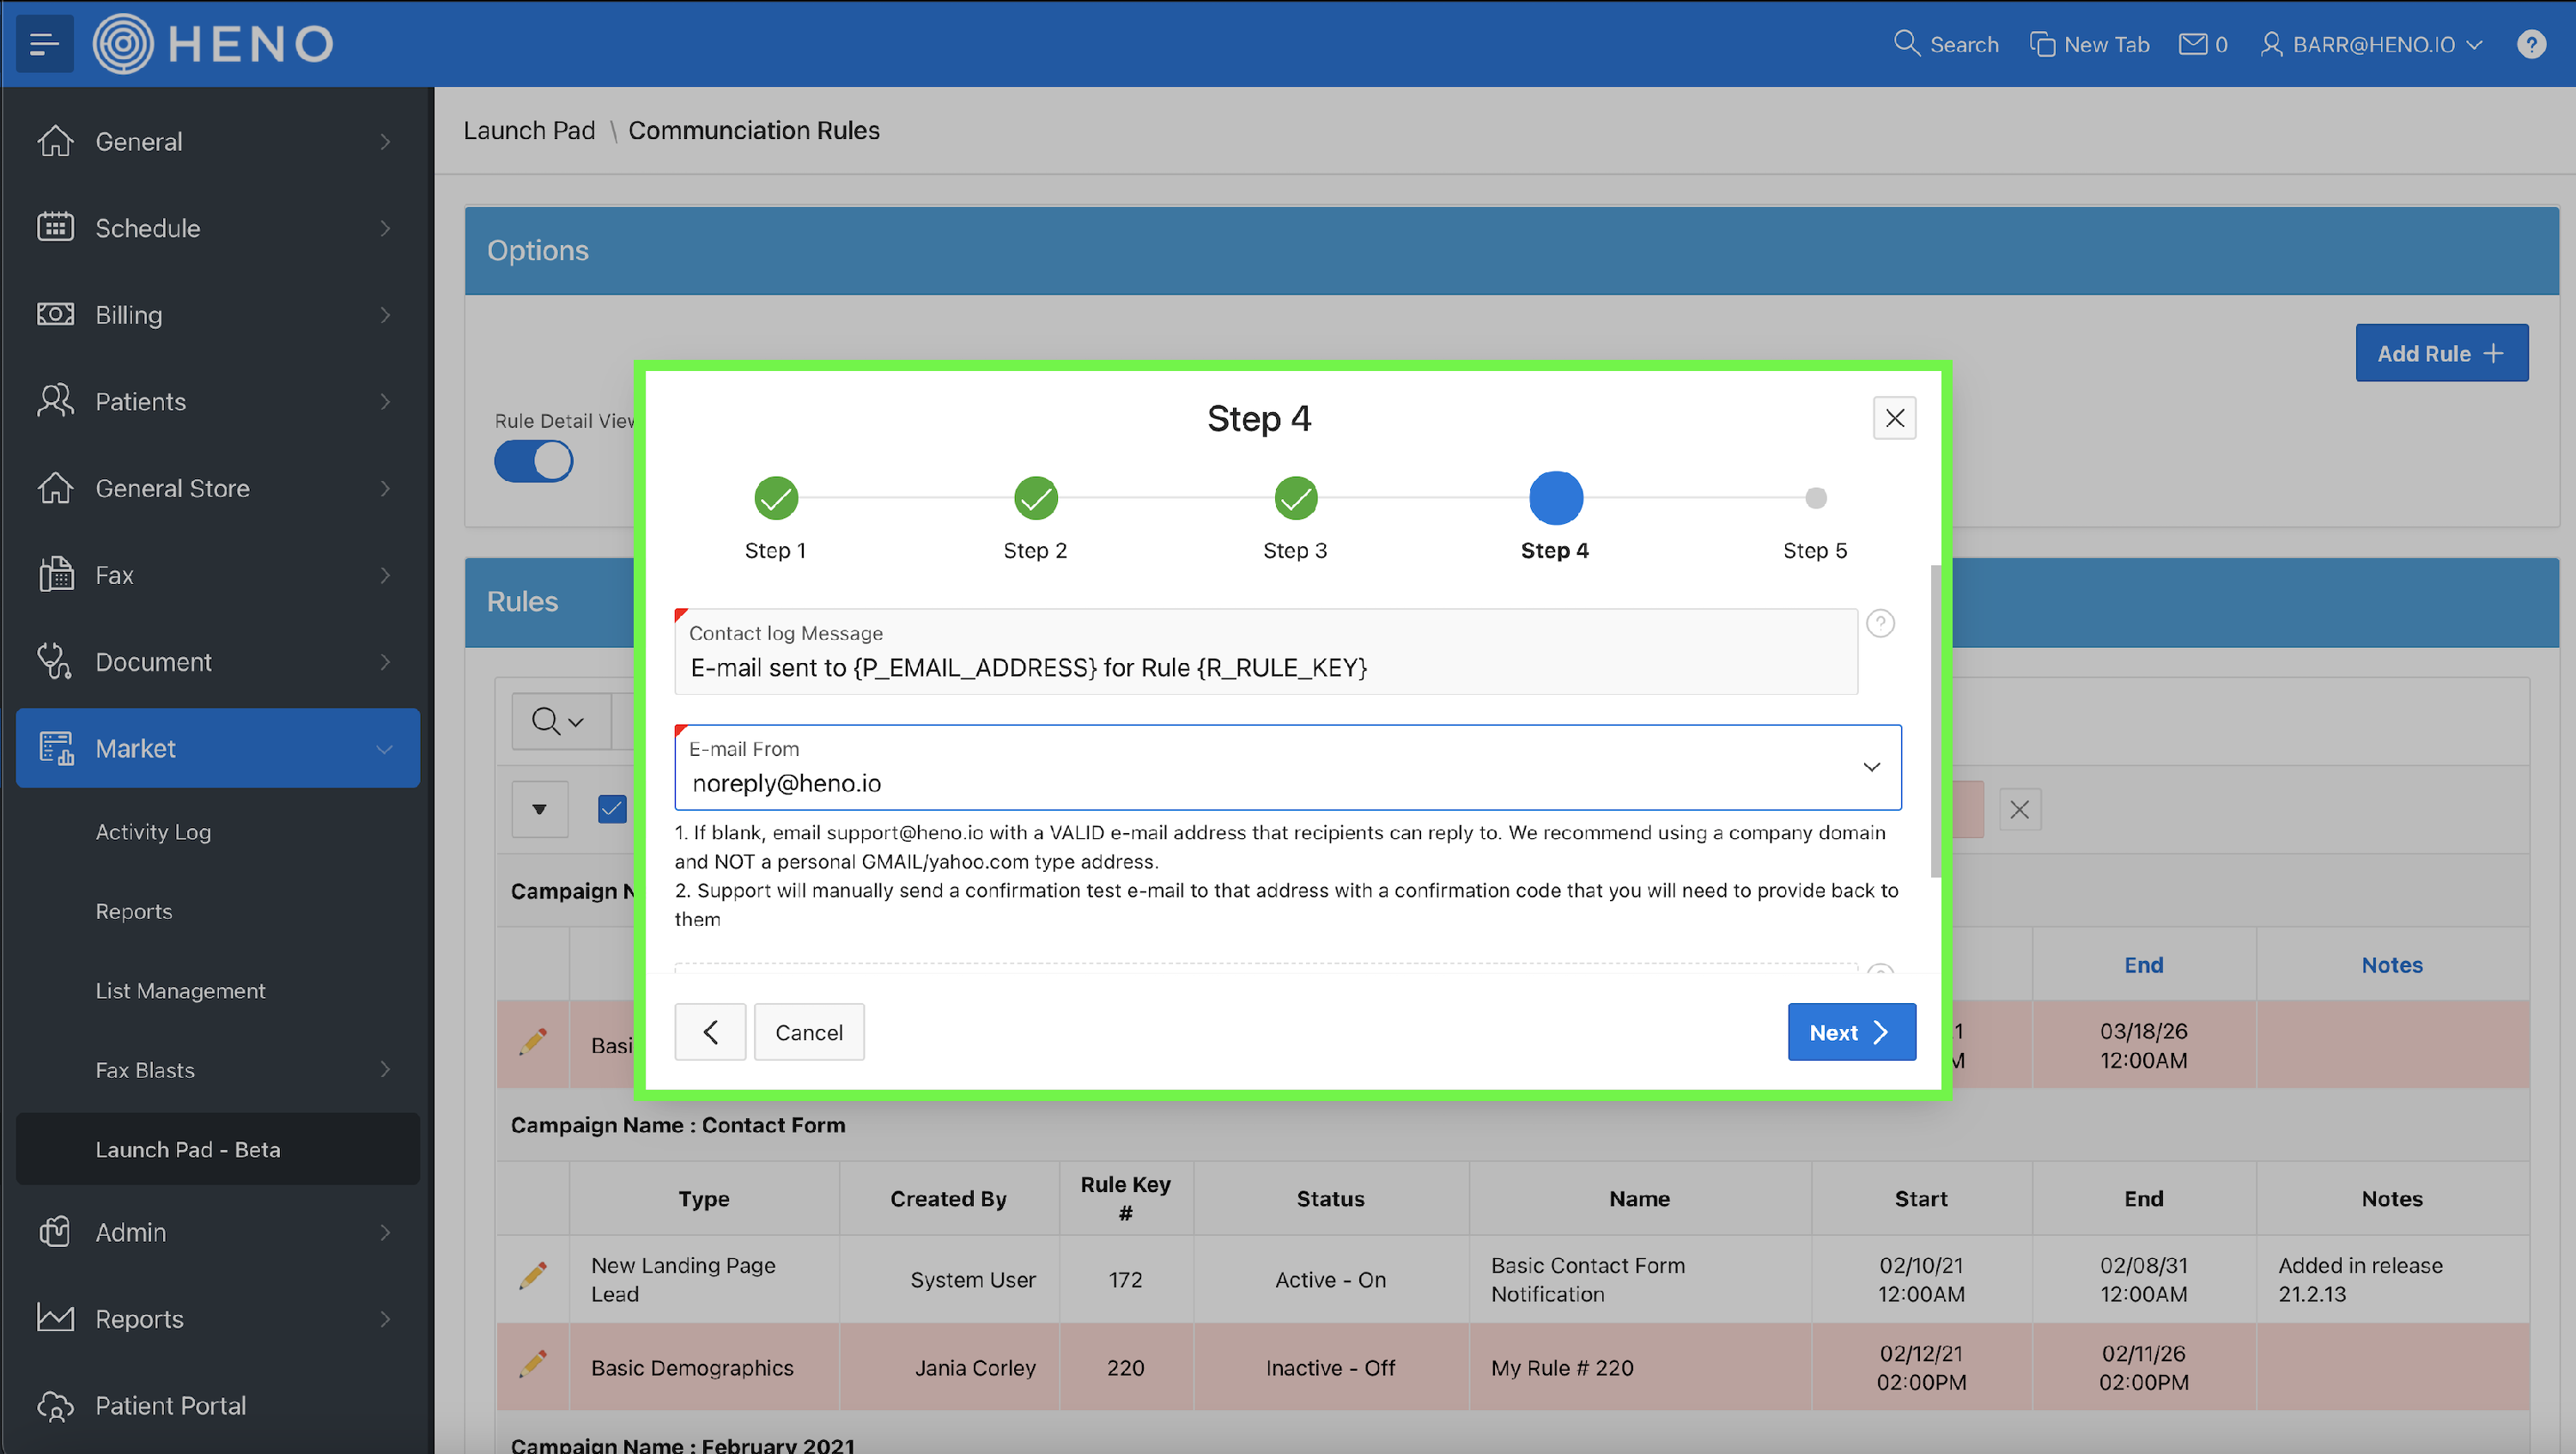
Next please select your email as the email you would like the outreach to be sent from, if you you do not see your email here please contact support@heno.io
Lastly you will need to confirm your rule:

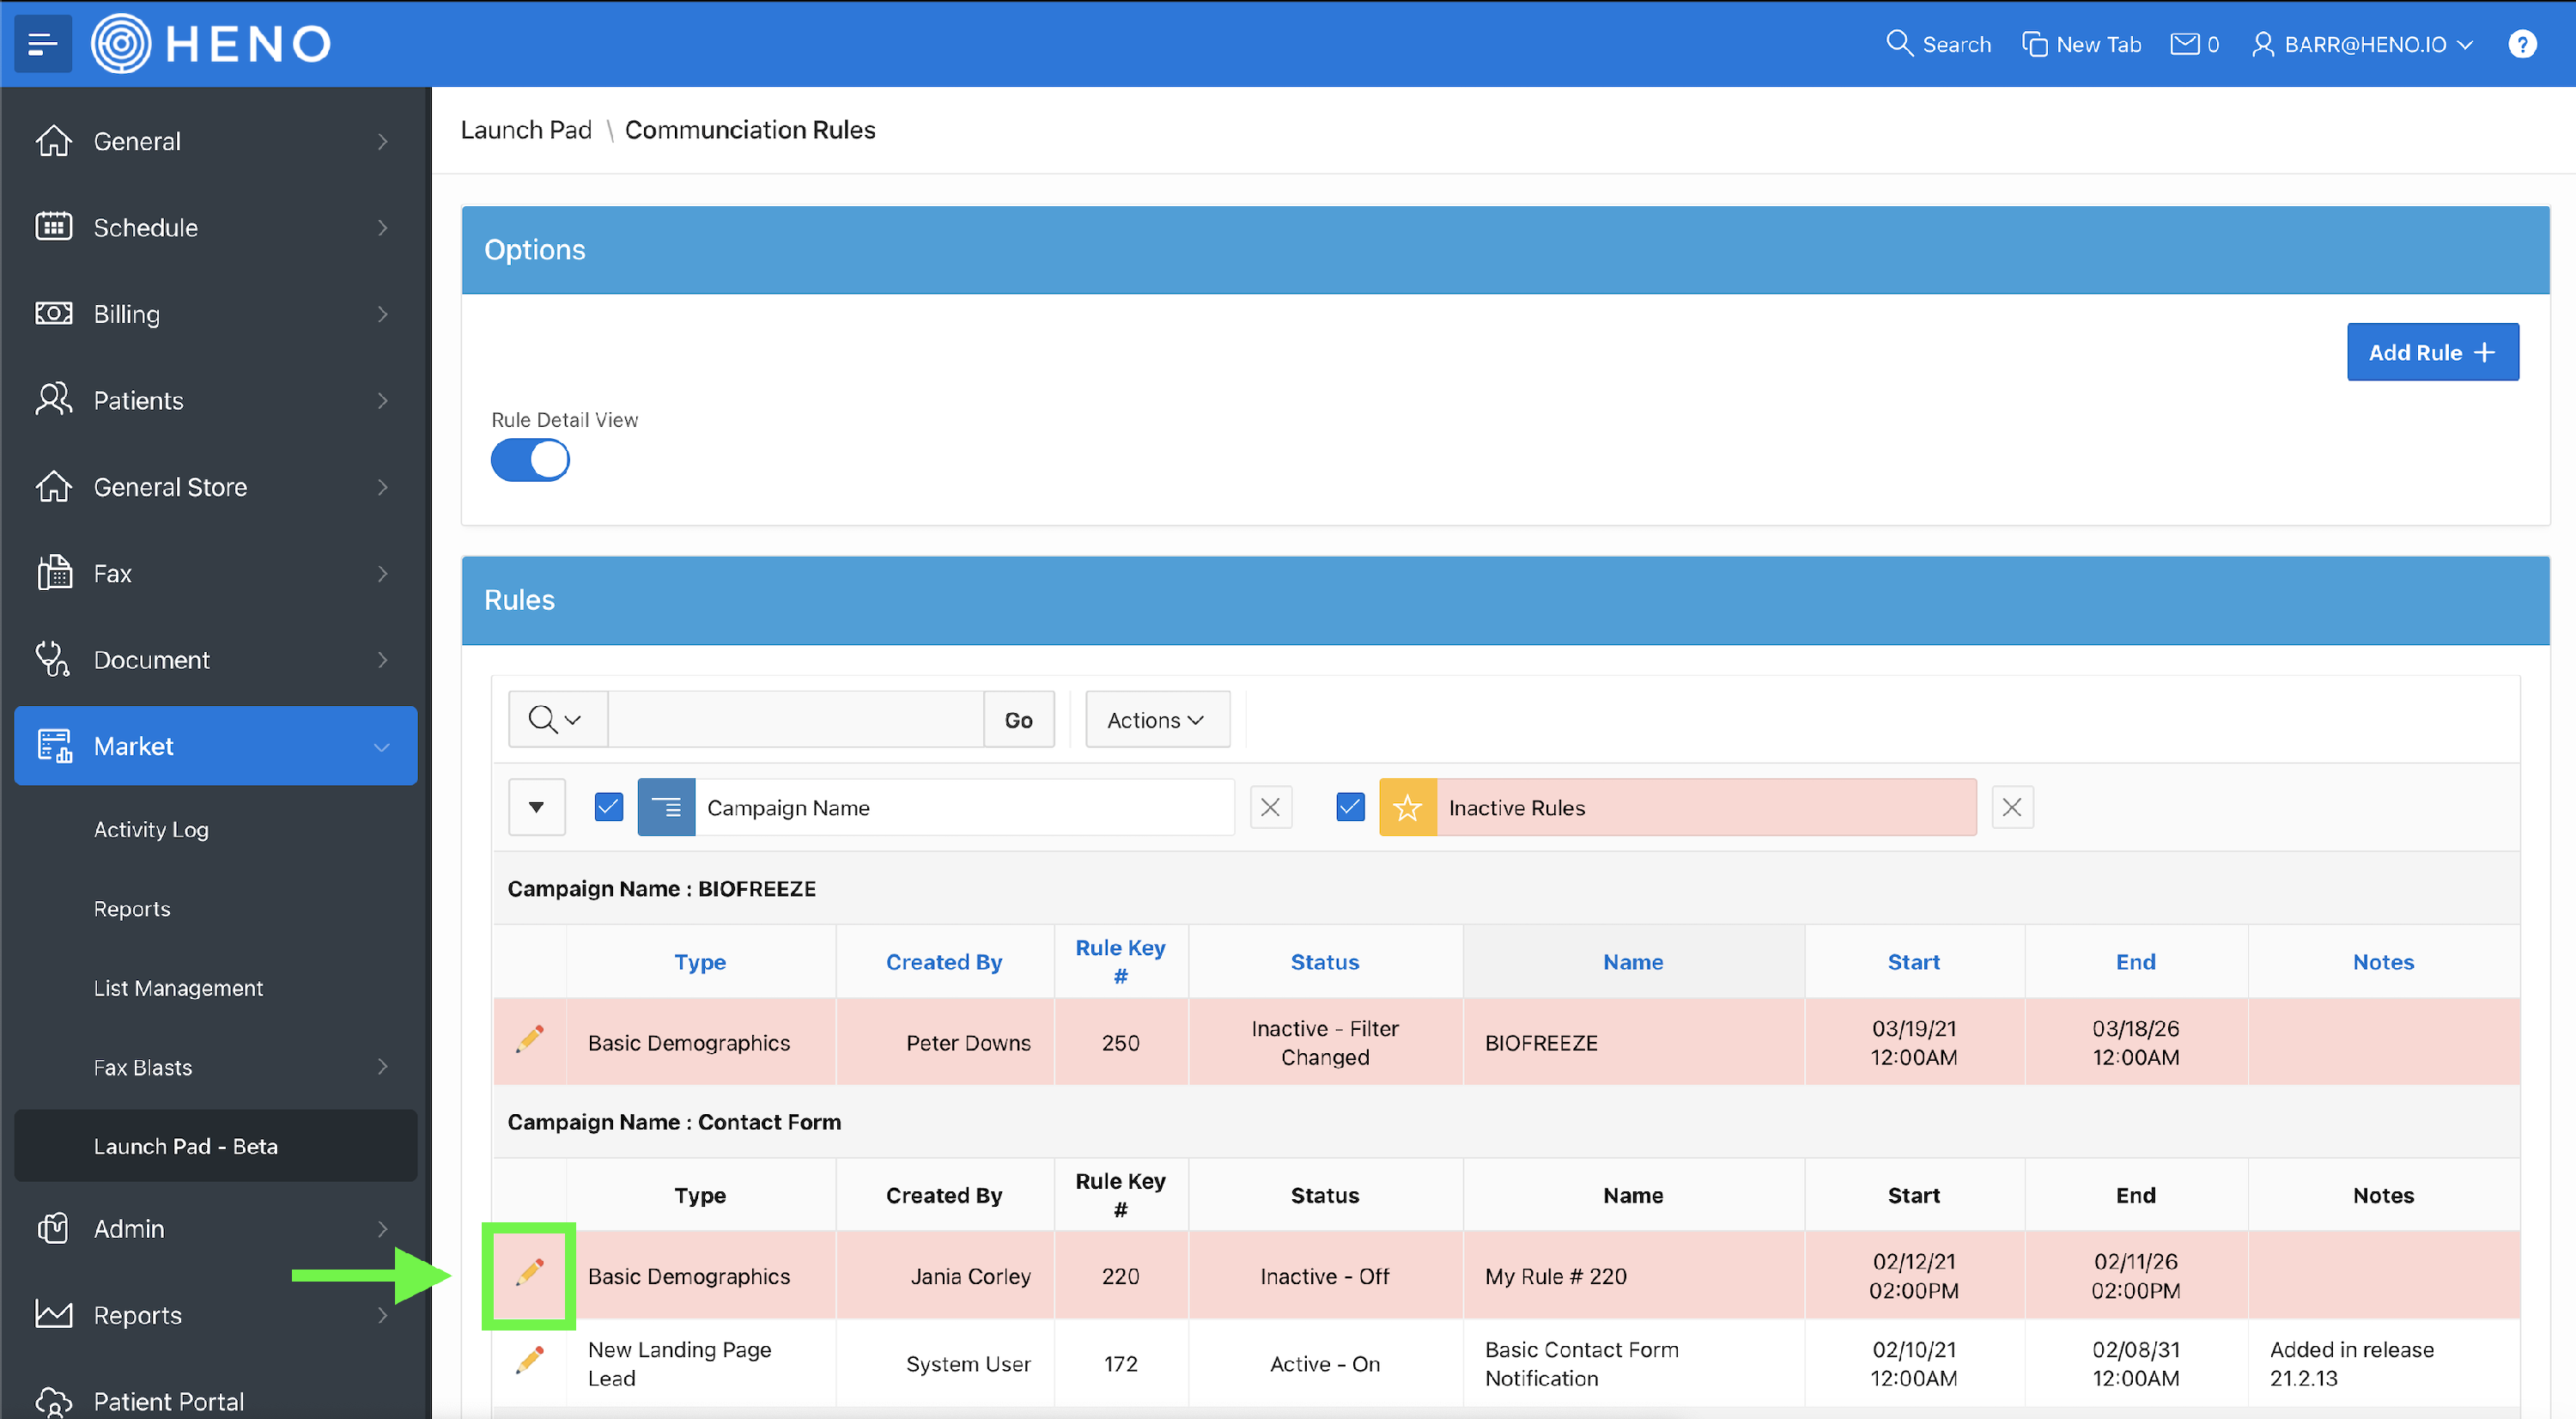
With your rule created you can click onto the edit pencil:
This is where we will construct our rule for which patients receive the email using the filter section and what the email states using the notification section.

First select any Sub Status that you would like for patients to receive the email:
 Next in the notification we can build the email that we would like to send to the patient:
 Now let's build the email by giving your email a subject and start writing in information for your email:
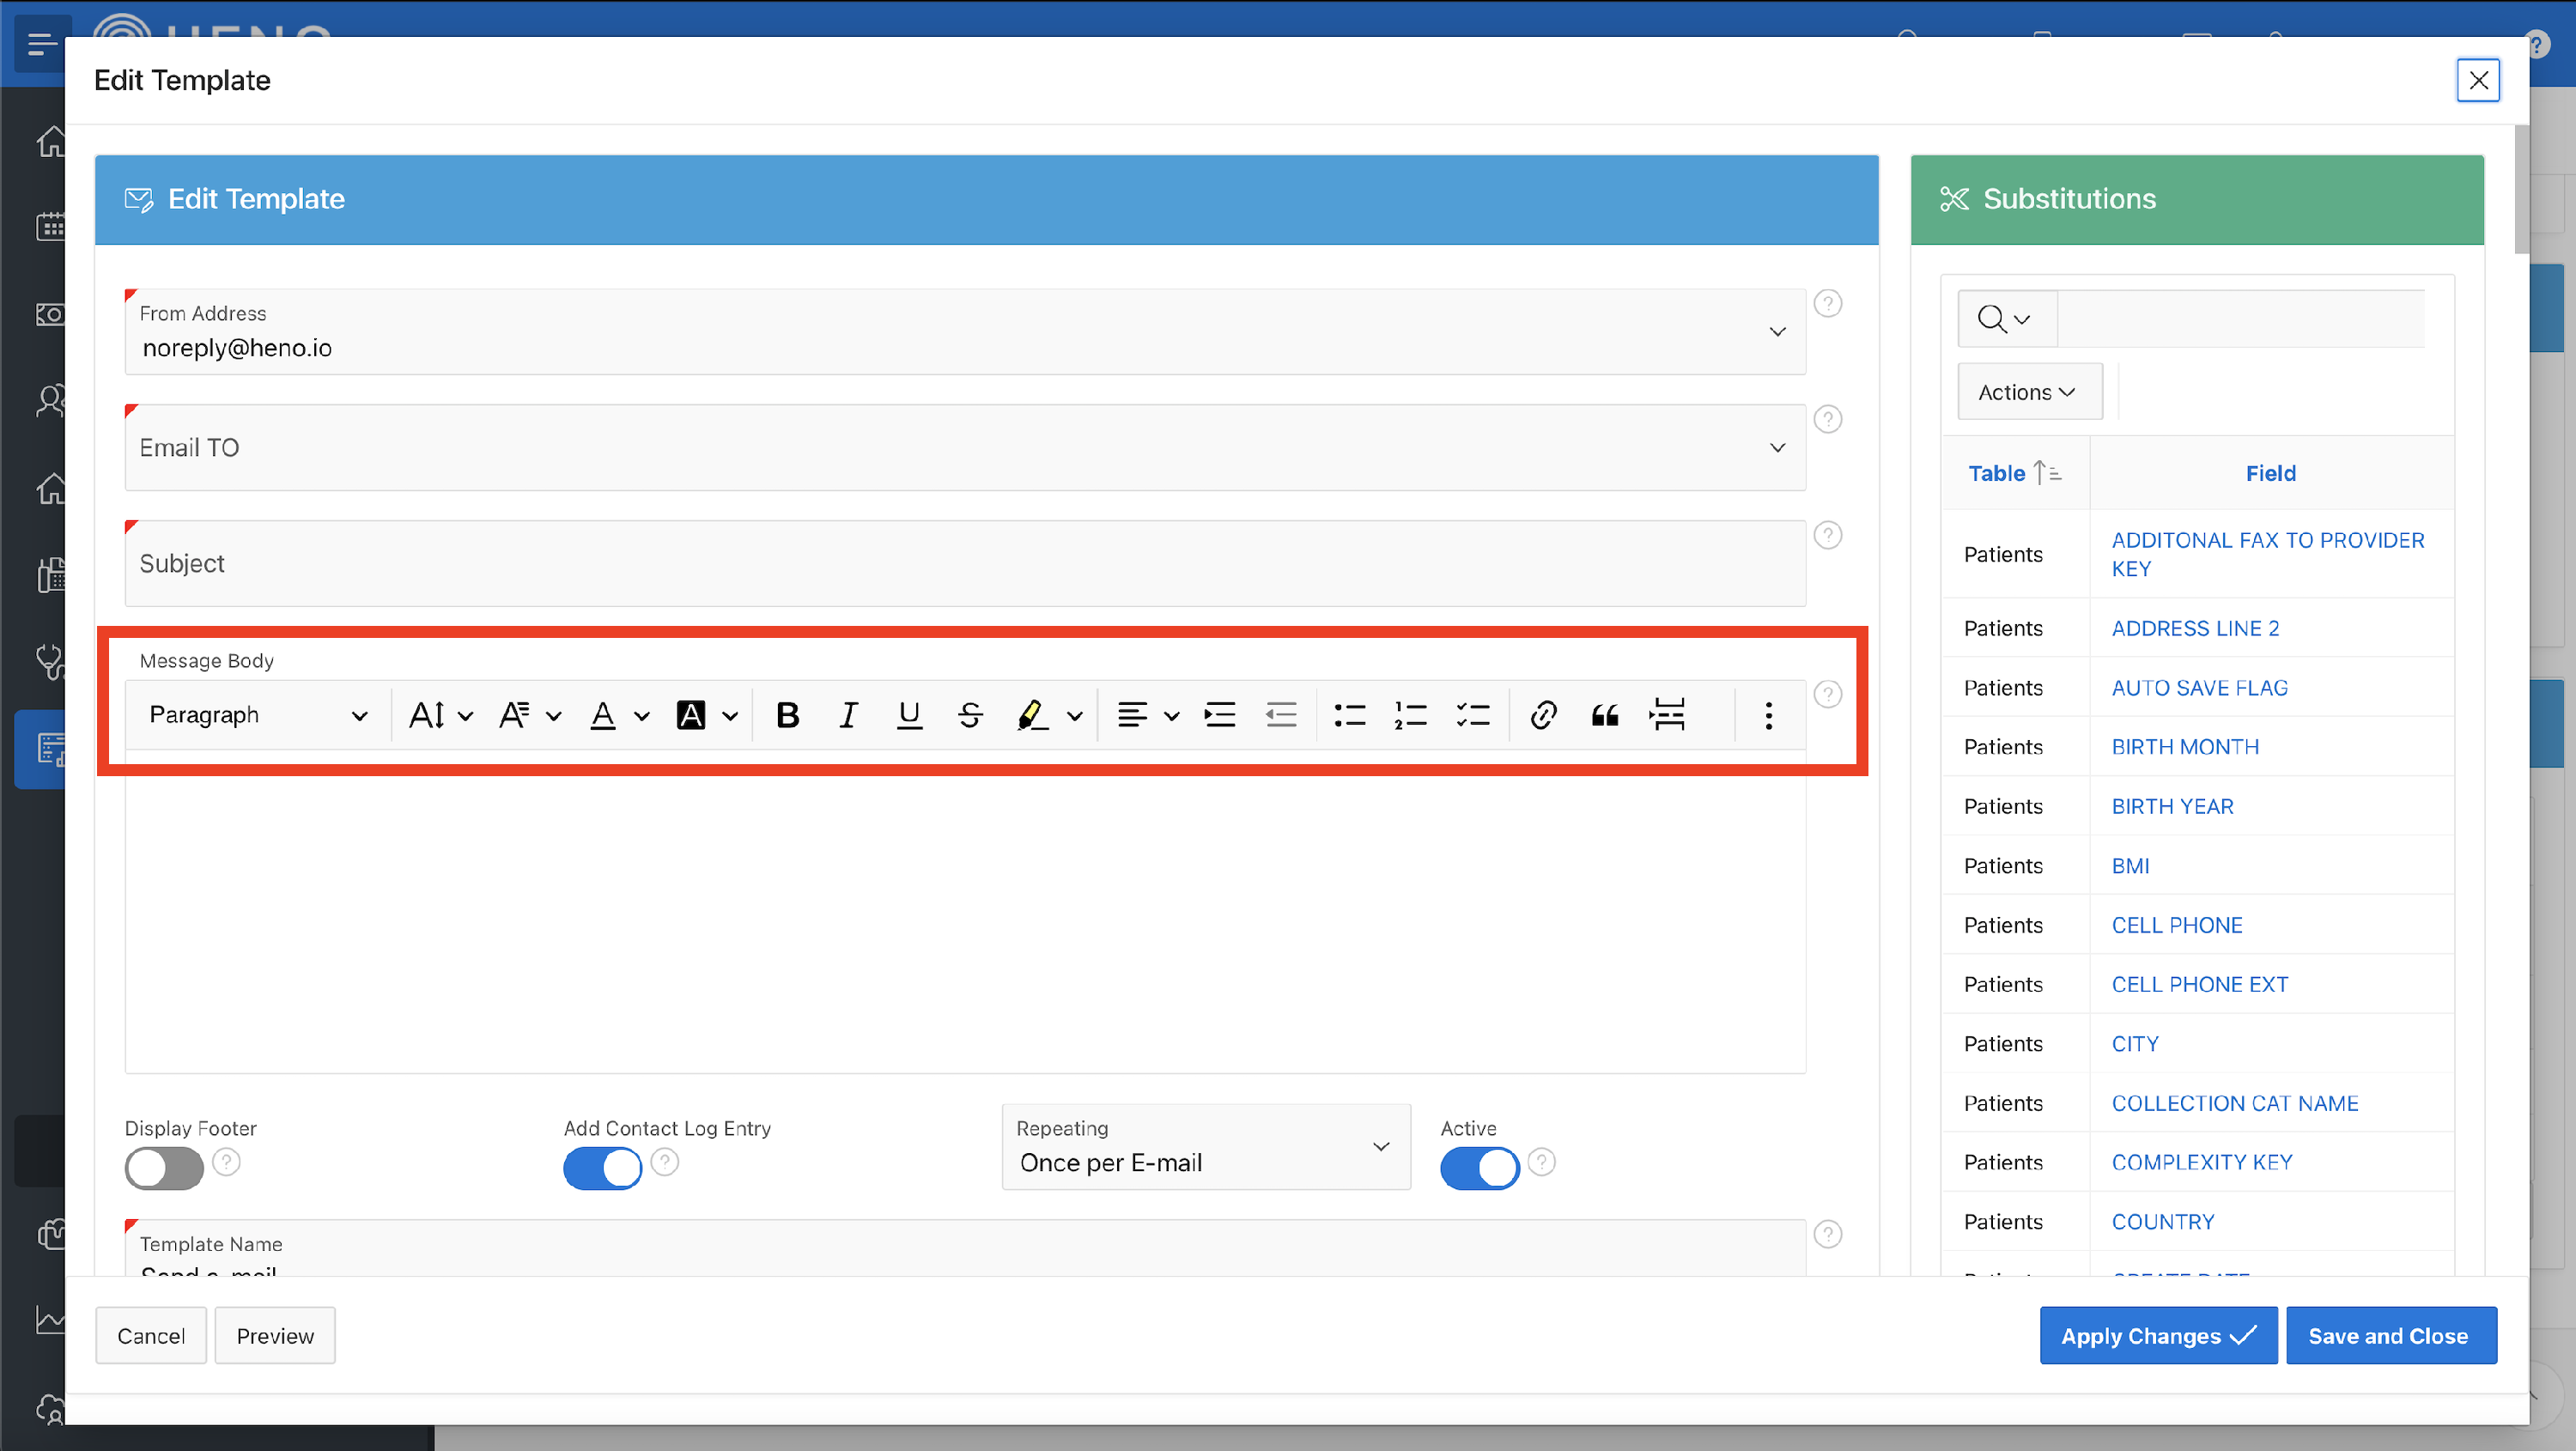
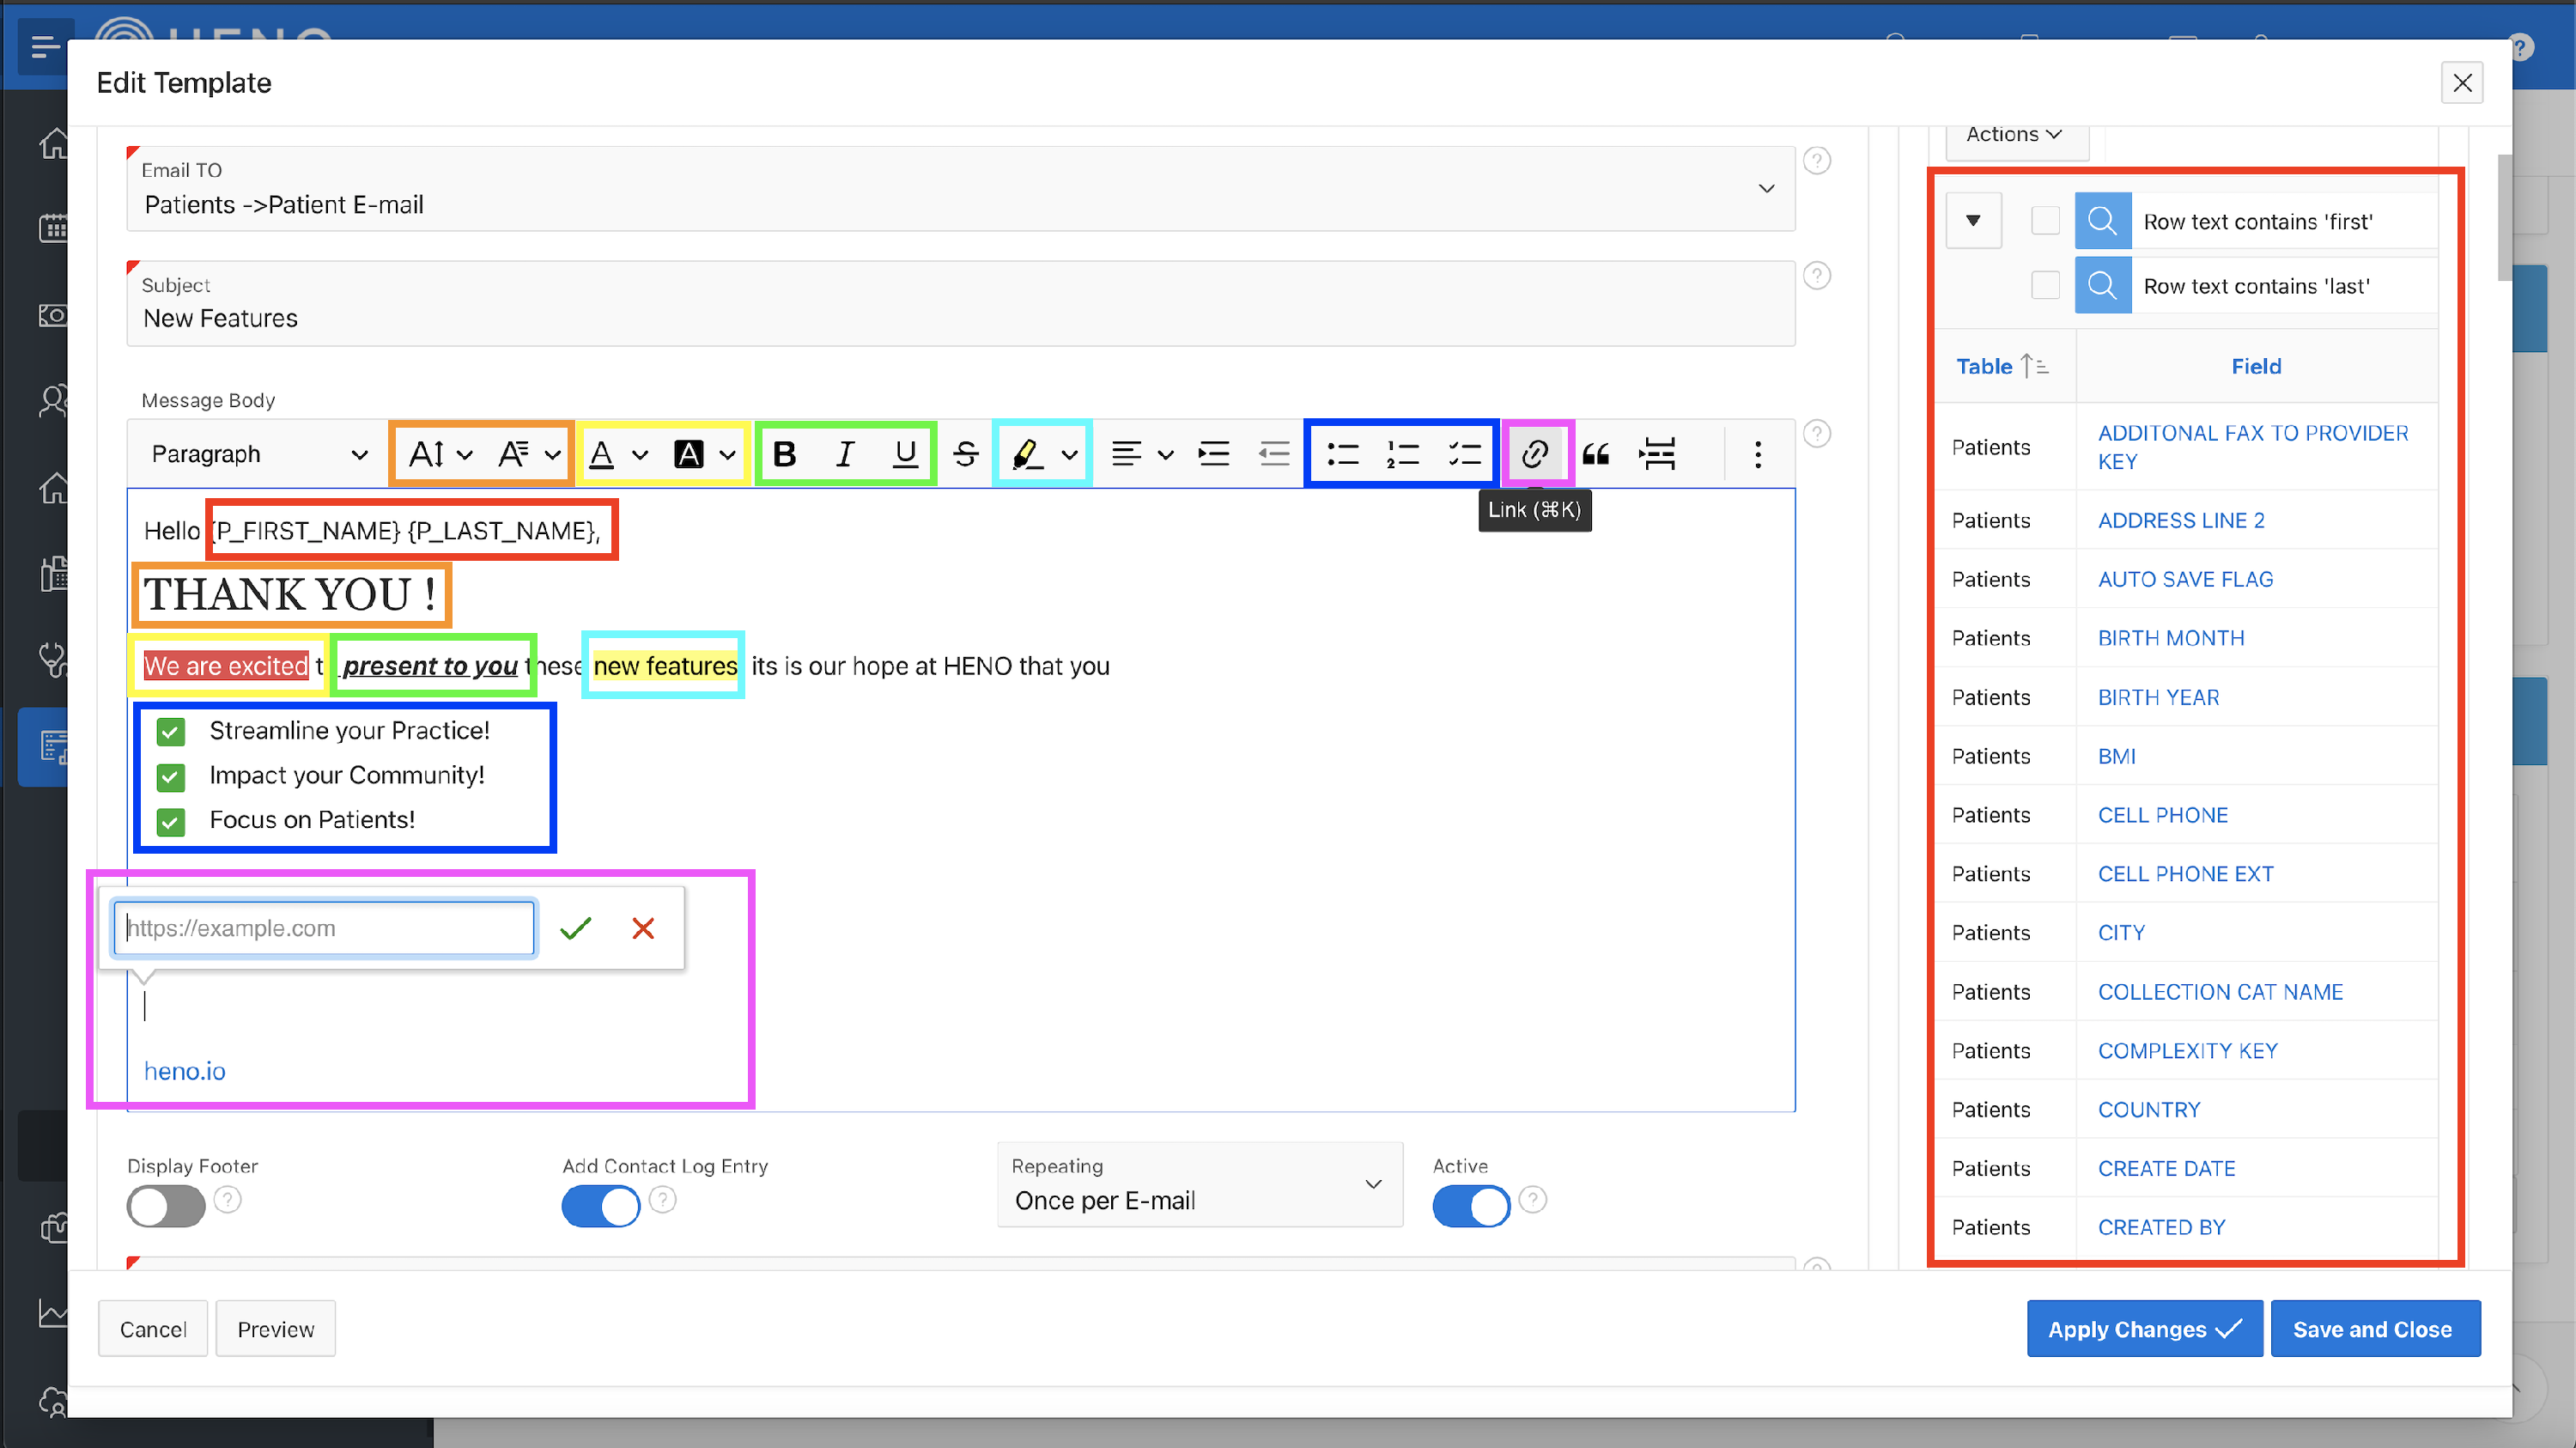
On the right side of the email builder you can also use our substitutions that will pull in the audience's information to make it more personal.
 If you would like, you can also use an HTML source to add in pictures and unique settings:
Two free sources include: https://html5-editor.net/ and https://html-online.com/editor/
For example the following:
 Once completed, let's preview our email:

Once your email is ready to be submitted, click onto the "Save and Close"
 With the email updated we will now activate our rule by clicking on the "Edit"
 A popup window will appear with the ability to "Activate Rule"

After clicking "Activate Rule" it will require you to confirm the "X/Number" possible recipients - in this example it is 14.


Once your email is scheduled to be sent, they will be sent out and a contact log will be added to the patient's profile if enabled in the rule set up:
 For patient's that do not wish to have any further emails you can inactivate from the Patient's account > Details > Marketing.
 If you have any questions with this article please contact us at support@heno.io