
Creating and Reporting on Refunds
In this Article
This article will cover Refunds for patients and insurance. It will also inform you on how to find who may need a refund and where it reports within Heno.
- 1
-
Creating a Patient Refund
If you are refunding a patient, you will want to start in
Billing > Refund. Here you will be able to view any refund you have issued or need to edit and complete.
- Pink Box
- You can edit a refund by clicking on the refund number
- Red Box
- This column will show what type of refund was issued
- Purple Box
- This column will show you the status the refund is in. This status will be set to Draft or Issued
- Orange Box
- Click on Create to create a new refund
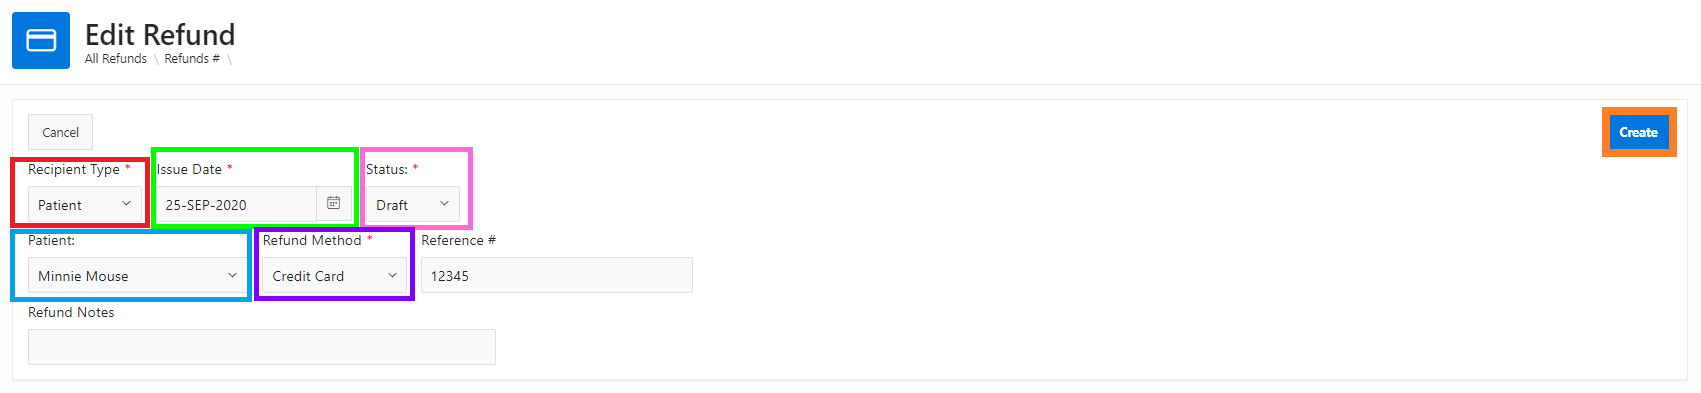
 Once you have clicked on create, you will be able to edit/create a refund
- Red Box
- This is where you will be able to set your Recipient Type (Patient or Insurance). This will always be set to patient when creating a new refund.
- Green Box
- Make sure to set your issued date to the date that you issued the refund to the patient
- Pink Box
- Keep the status as Draft until you have added all the payments and have the amount of the refund
- Blue Box
- Click the drop down to select which patient you are issuing a refund to
- Purple Box
- Click the drop down to select the payment method you are issuing the refund
- Orange Box
- Click Create to make your refund
To add payments to the refund click here to view the steps.
- 2
-
Creating an Insurance Refund
If you are refunding an insurance, you need to go back to Billing > Refund.
- Purple Box
- This time, you're going set your Recipient Type to Insurance. This will always be set to patient when creating a new refund.
- Orange Box
- Make sure to set your issued date to the date that you issued the refund to the insurance
- Green Box
- You can either leave the status of the refund as Draft (if you need to come back and edit it) or set it to Issued if you have already issued the refund or when you do you issue it
- Red Box
- Click the drop down to select which insurance you are issuing a refund to
- Black Box
- Click the drop down to select the payment method you are issuing the refund
- Yellow Box
- Click Create to make your refund
- 3
-
Going back to a Draft of a refund
If you are ready to issue a refund that you have created and left in a
Draft status, just go back to
Billing > Refund.

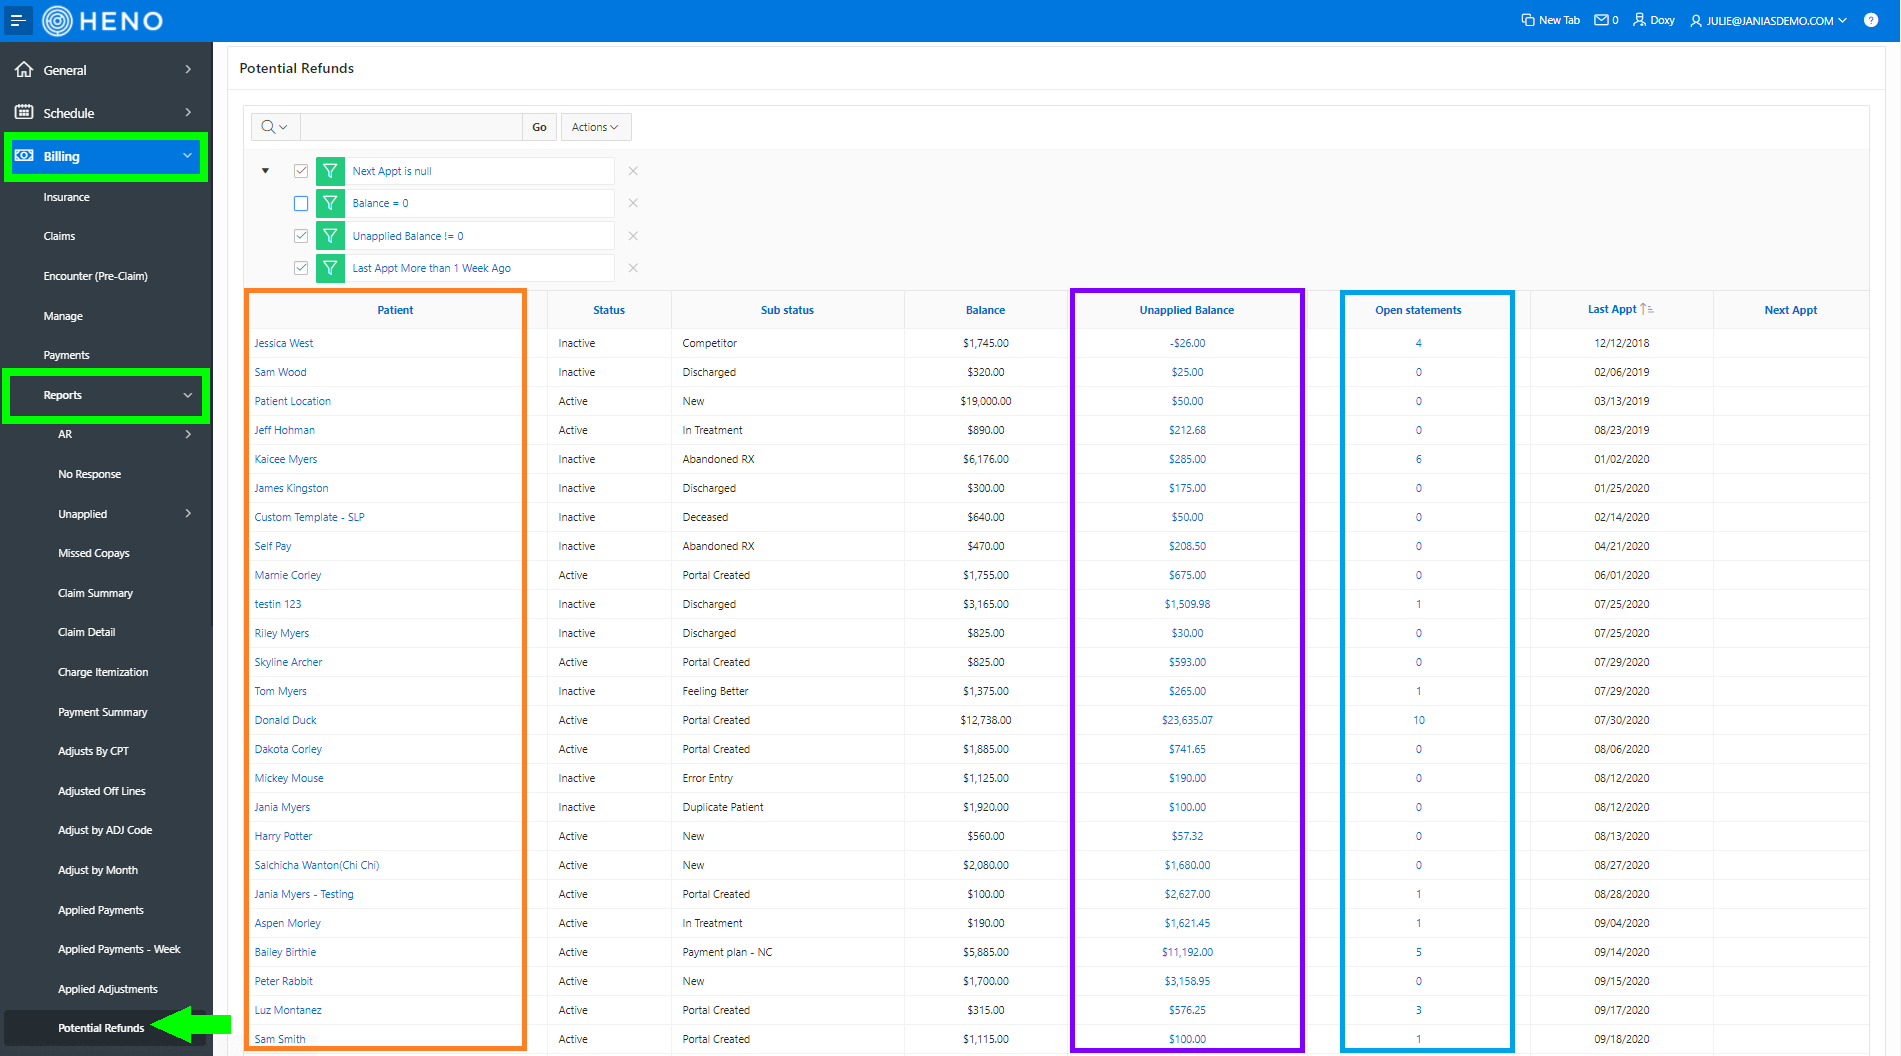
- Orange Box
- By clicking on the patient's name in this column, you will be able to view the patient's profile
- Purple Box
- Within this column, you can click on the balance and make any changes to that patient's unapplied balances.
- Blue Box
- Quickly view statements for a patient
- 6
-
Where do the refunds show in payment reporting?
If you are needing to report on your refunds for Insurance and Patients, you're able to by going to
Billing > Payments.
- Purple Box
- Once you're in this section, click on the Actions drop-down
- Blue Box
- On the Do Not Display side, scroll to Refund.
- Click the arrow facing the Display in Report side
- Click Apply


Once you click on apply, you will see a new column named Refund. You will be able to put this column on the Patient payment reporting as well.
