Creating a Payment Plan
In this Article
Creating the Payment Plan
- Paying off a balance
- Paying for future treatment (total cost of care)
To start the creation of the payment plan, you will want to be in the Billing tab -> Payment Plan:
 You will be able to see Current payment plans in progress.
To create a new payment plan, click on the Create in the upper right hand side:
 This will give you a pop-up to be able to add the following information:
- Red: Patient - This will be the patient enrolled into the payment plan
- Blue: Plan Description - This is an optional name that can be added to assist in identifying the plan and run reporting
- Green: Recurring - This will allow you to select what recurring type: Weekly, Monthly, or Certain Number of days
- Orange: X= - This will allow you to select how the number of months, weeks, or days based on the type. (i.e. every 1 month)
- Purple: Starting - Select the starting date for the payment plan. **Please keep in mind that you cannot start a payment plan the day it is created.
- Pink: Total Amount - This is the FULL amount of the payment plan
- Light Blue: Installments - How many installments payments do you want the full amount to be broken?
- Gold: Method - You will be able to link a method type. If you are using Card on File, there will need to be at least one transaction completed on the patient prior to being able to link a credit card
- NEW - Brown: General Store - If the patient has a closed order with a balance linked to their account, you will be able to link the general store order. This will collect the payment and auto apply the payment to the general store order
- Black: Notes - Mark any additional notes that you would like to have on this payment

Once the payment plan is created, this will take you inside of the payment plan to review and update if needed:
Editing and Paying installments
From inside of a payment plan, you will be able to:
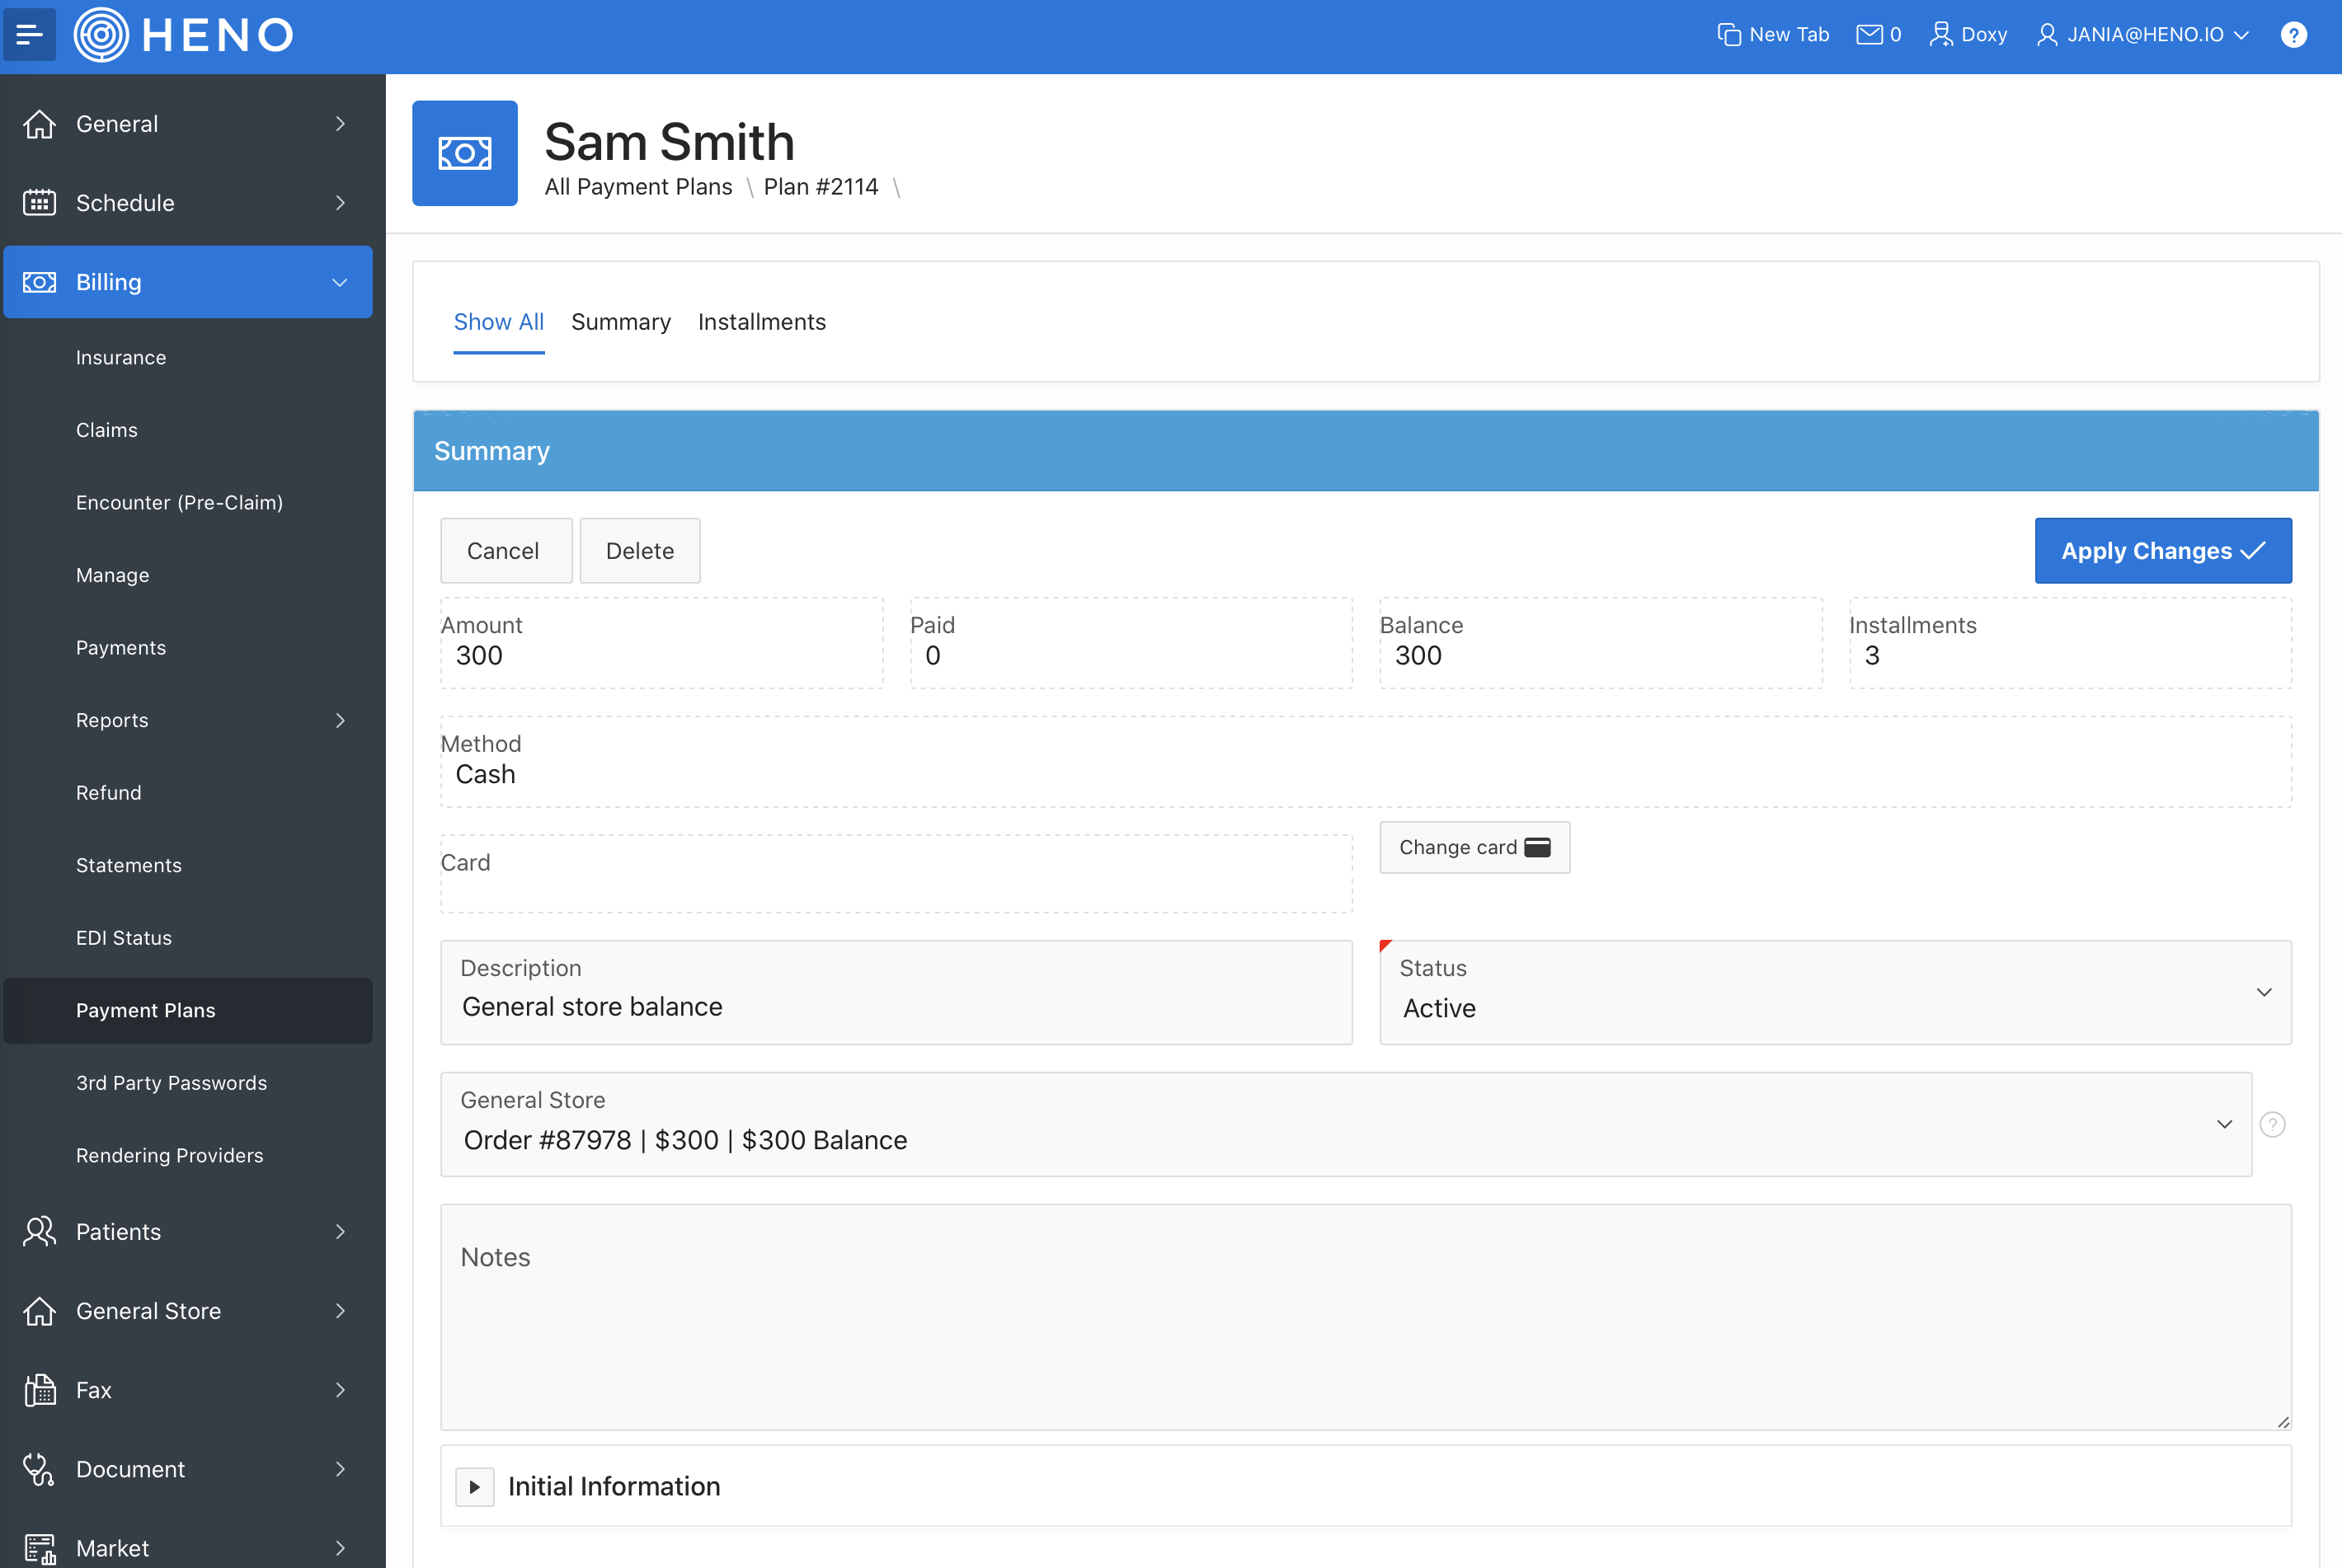
When accessing a payment plan that was already created, you will want to start on the Billing tab -> Payment Plans. Then click on the payment plan number you are editing:

Editing Installments
Inside on the payment plan, you will want to scroll to the bottom of the page or click on the Installment tab and click on the Edit Pencil or Installment number:
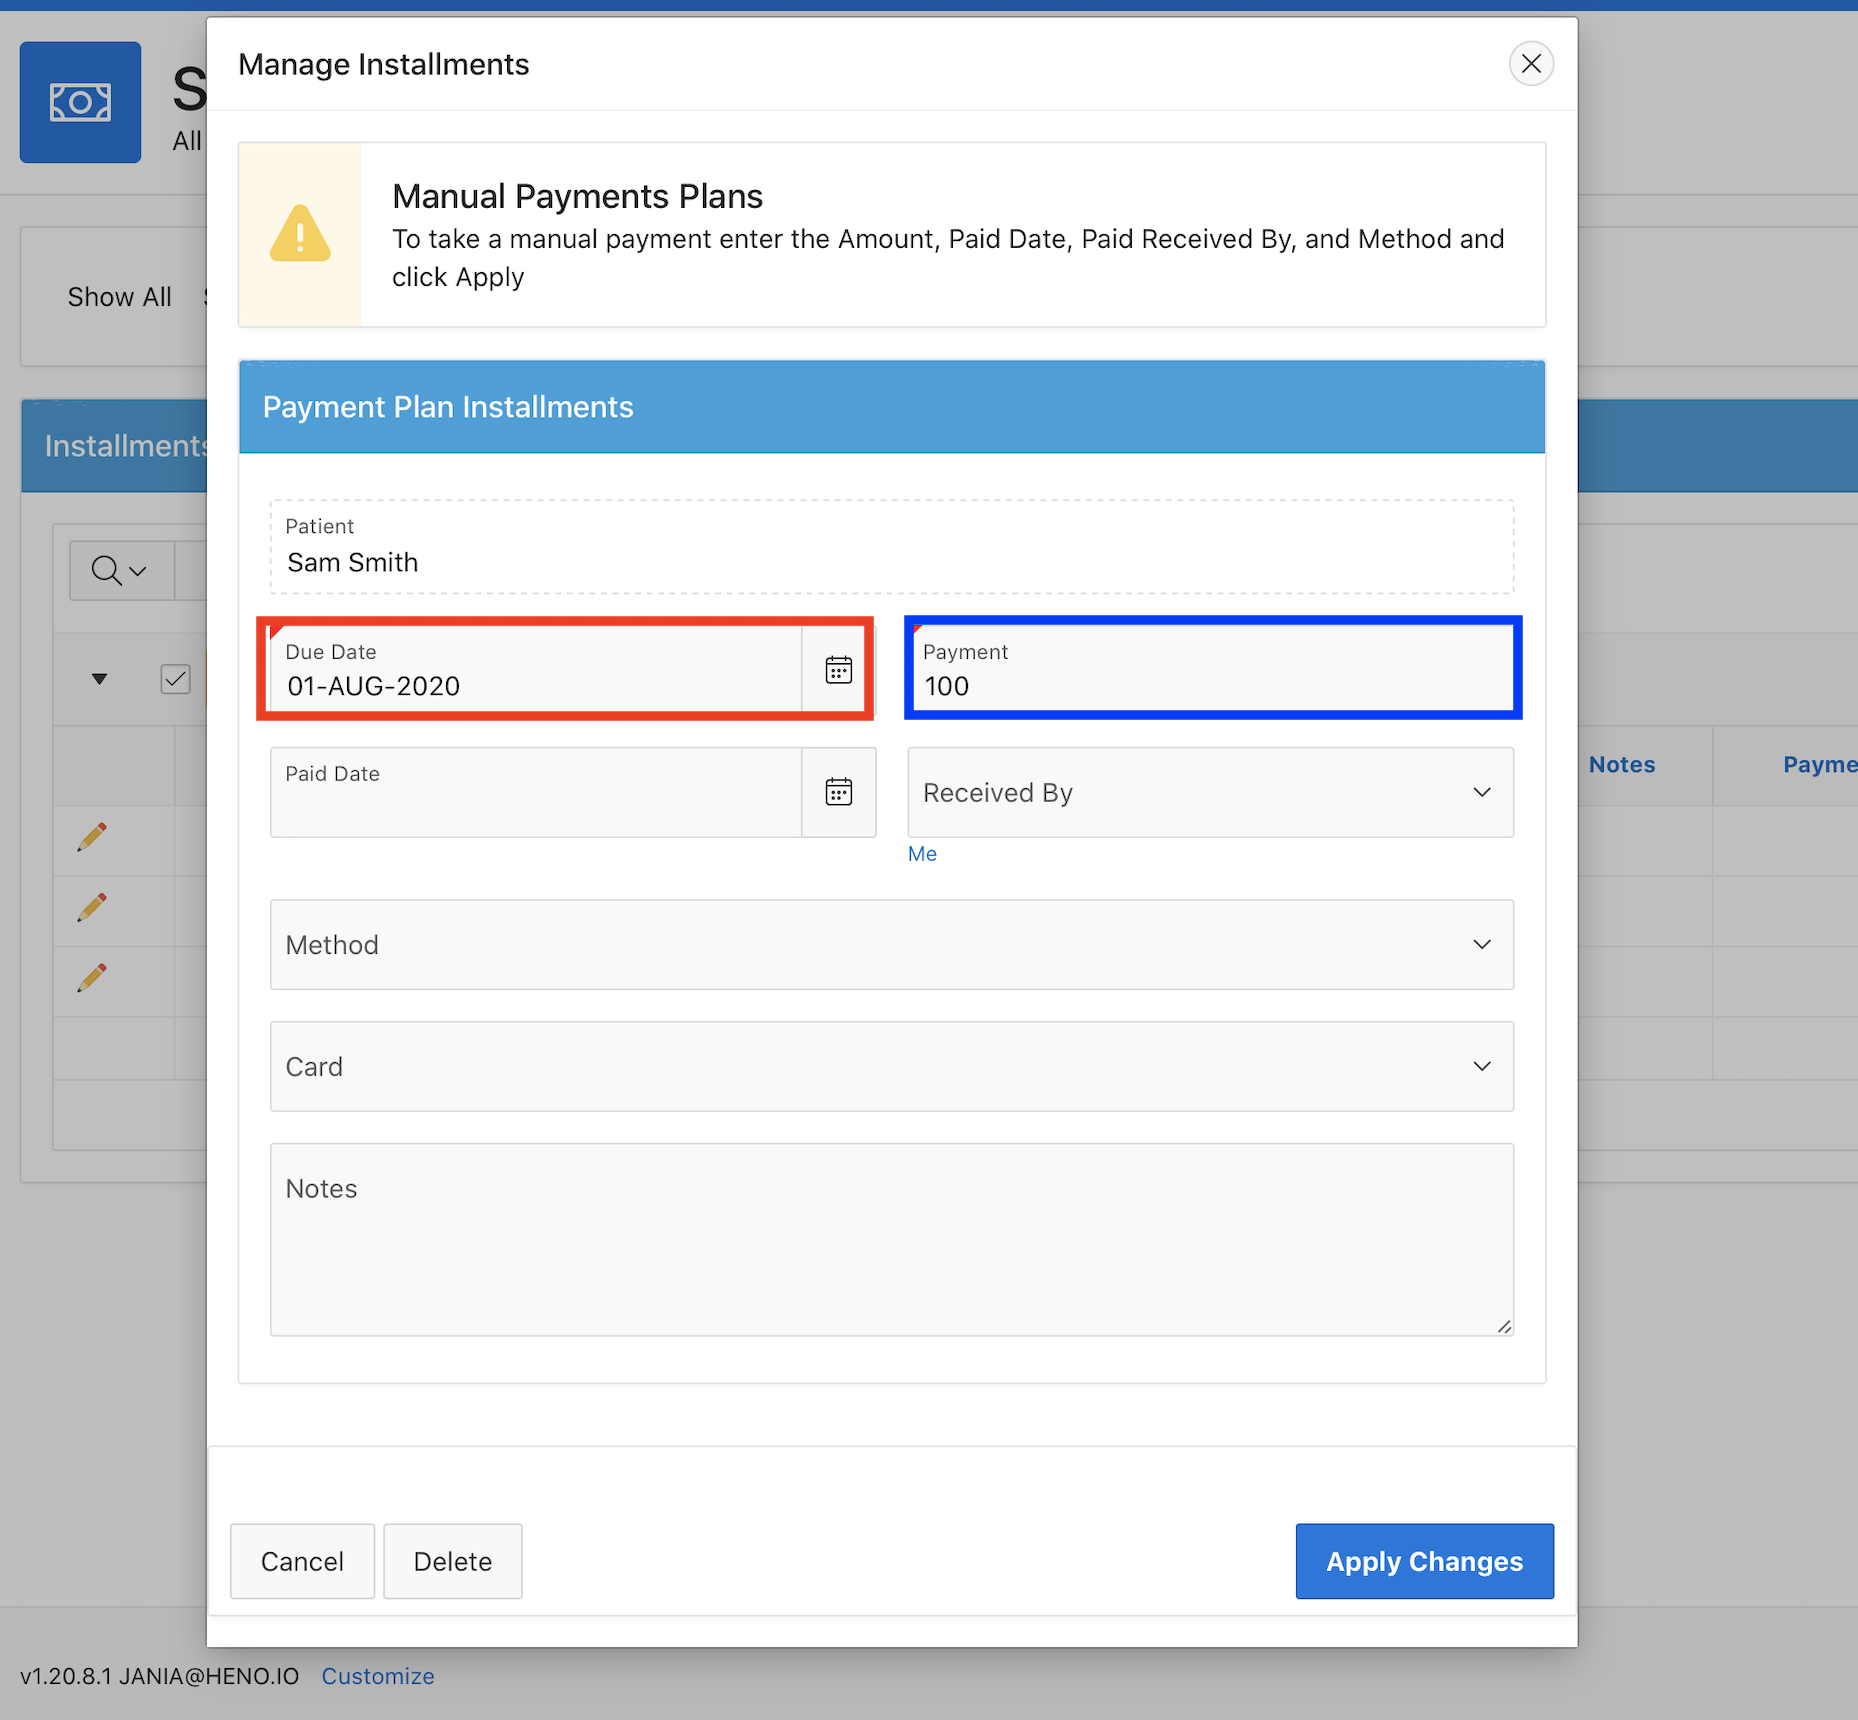
 In the pop-up, you will be able to edit the following information:
- Red: Payment Date
- Blue: Amount of Payment. *Please note: Changing the amount will not create another installment. Please be sure to adjust as needed.
Adding an Installment
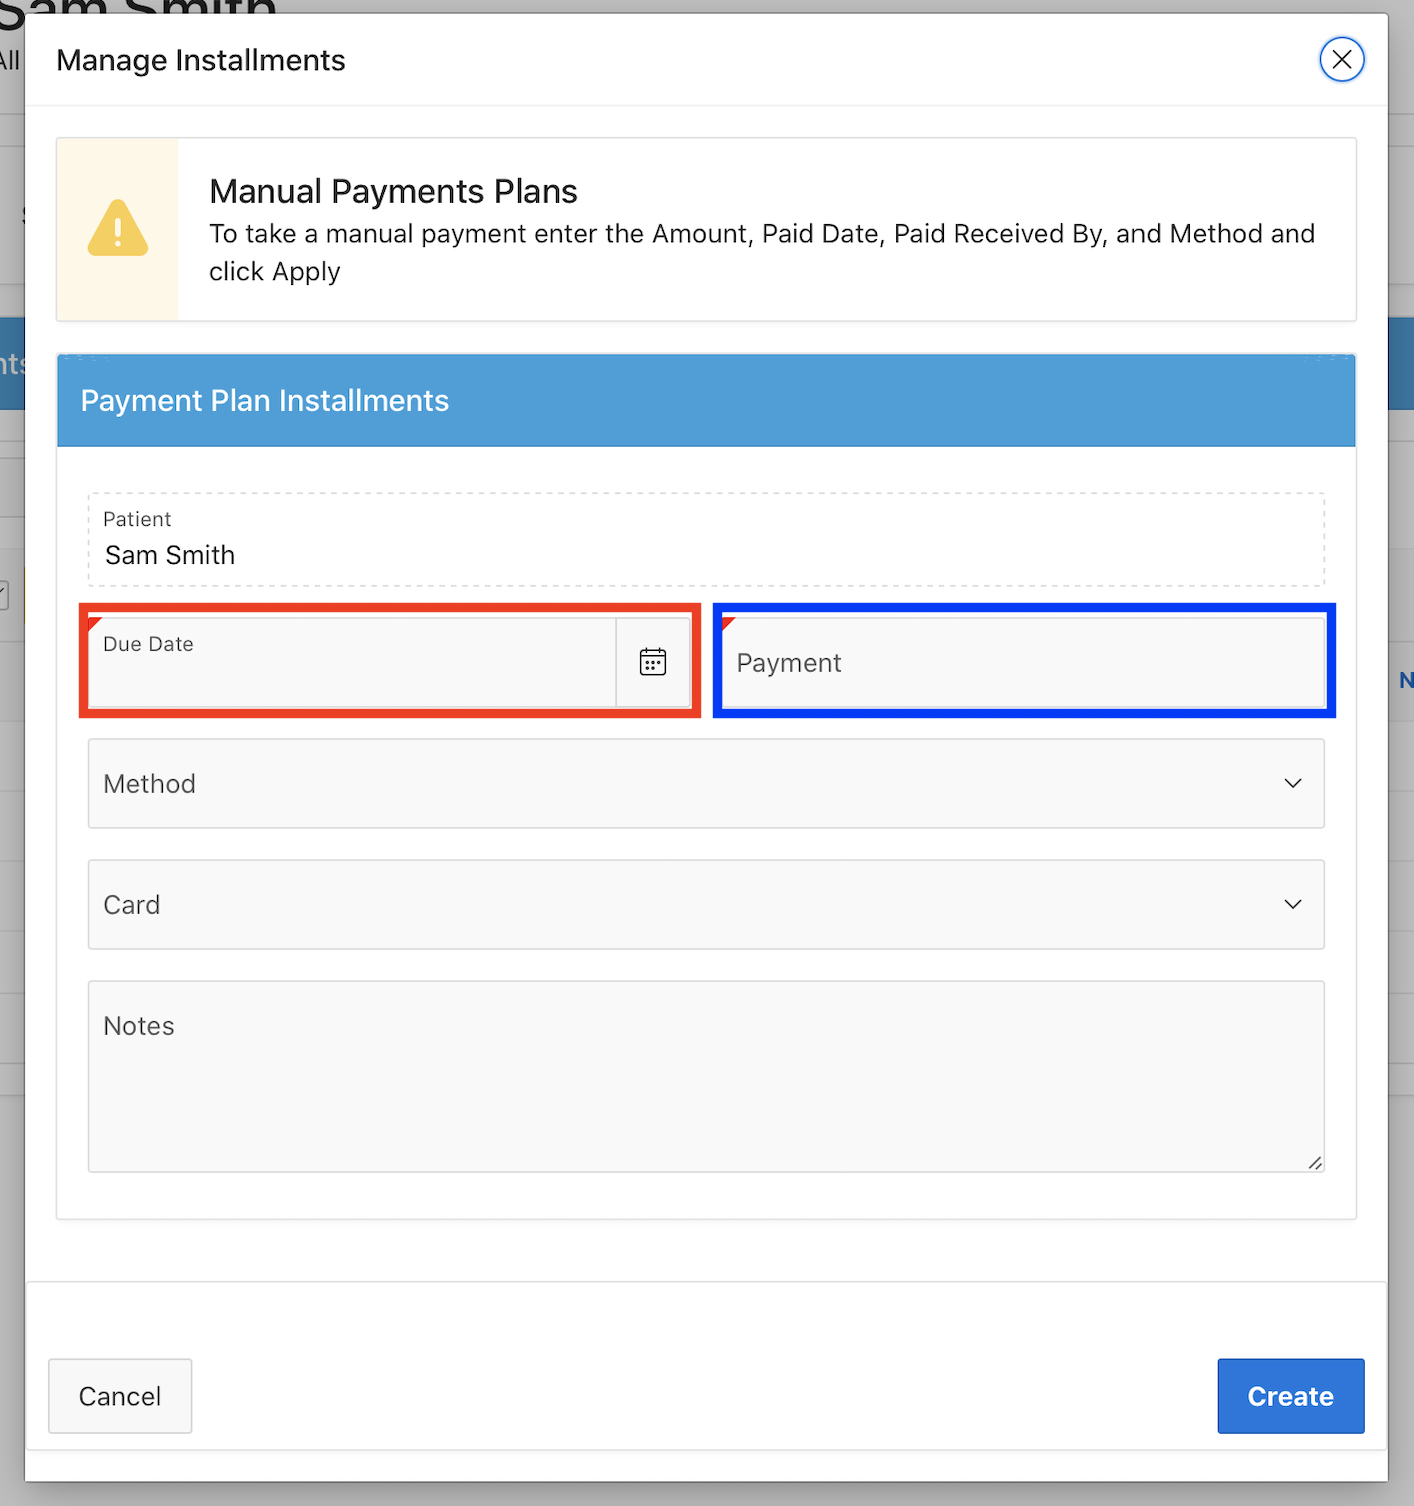
You are able to add an additional installment if it is needed for this payment plan. This can be completed by going to the Installment tab or scrolling down on the page. Click on Add Installment:
 This will give you a pop-up window to add in the installment payment amount and the date it will need to be collected:
Collecting a Payment
Inside on the payment plan, you will want to scroll to the bottom of the page or click on the Installment tab and click on the Edit Pencil or Installment number:
In the pop-up, select the following for payment collection:
**Please note: If you are using Card on File this will automatically create the payment.
- Red: Paid Date - Select the date the payment is being generated on
- Blue: Received by - The employee creating the installment payment (Me quick text will update to the user logged in)
- Green: Method - The way the payment was made. You can use a card on file to collect this payment if you are collecting a different date than the installment is due to run
- Orange: Card - Using only when using the Card on File option on Method
- Purple: Notes - Any notes you would like to mark on the installment
If a payment plan is for treatment, this will need to be manually posting (similar to a patient payment)
NEW - If a payment plan is for a General Store item (and linked), the payment will automatically apply to the General Store order

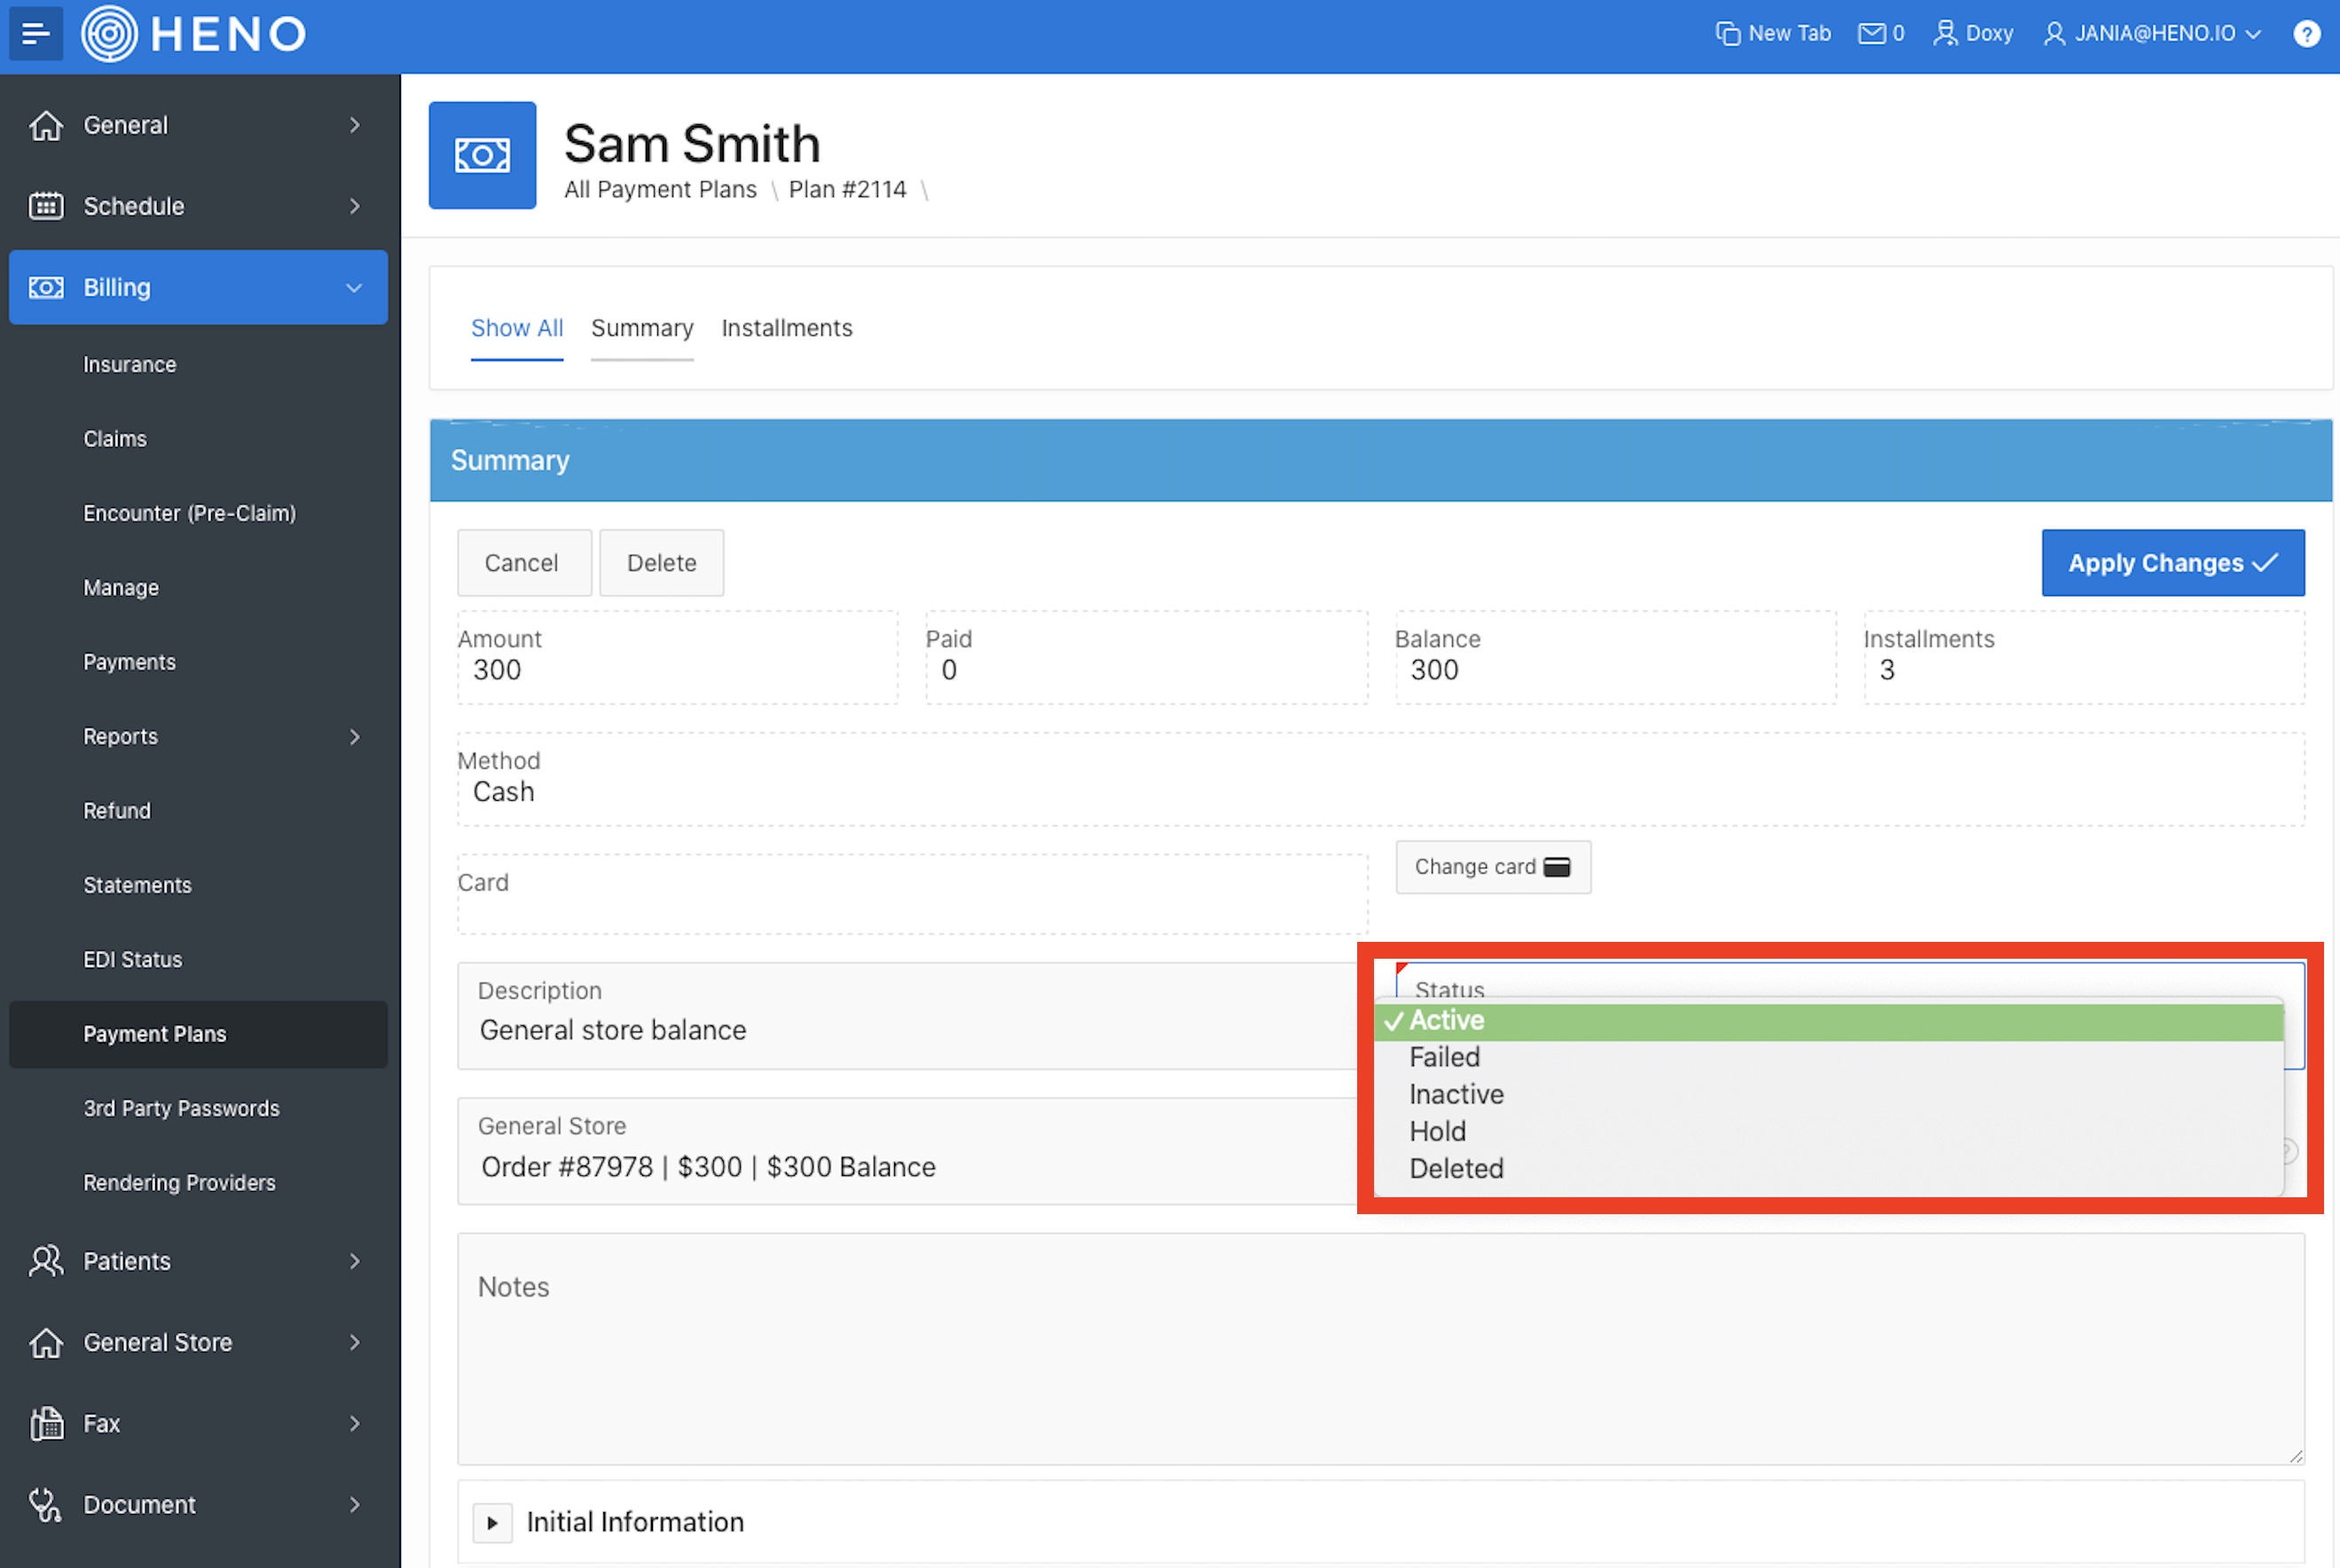
Deactivating a payment plan
You will want to click on the Status Drop down to select the Status of the Payment plan:
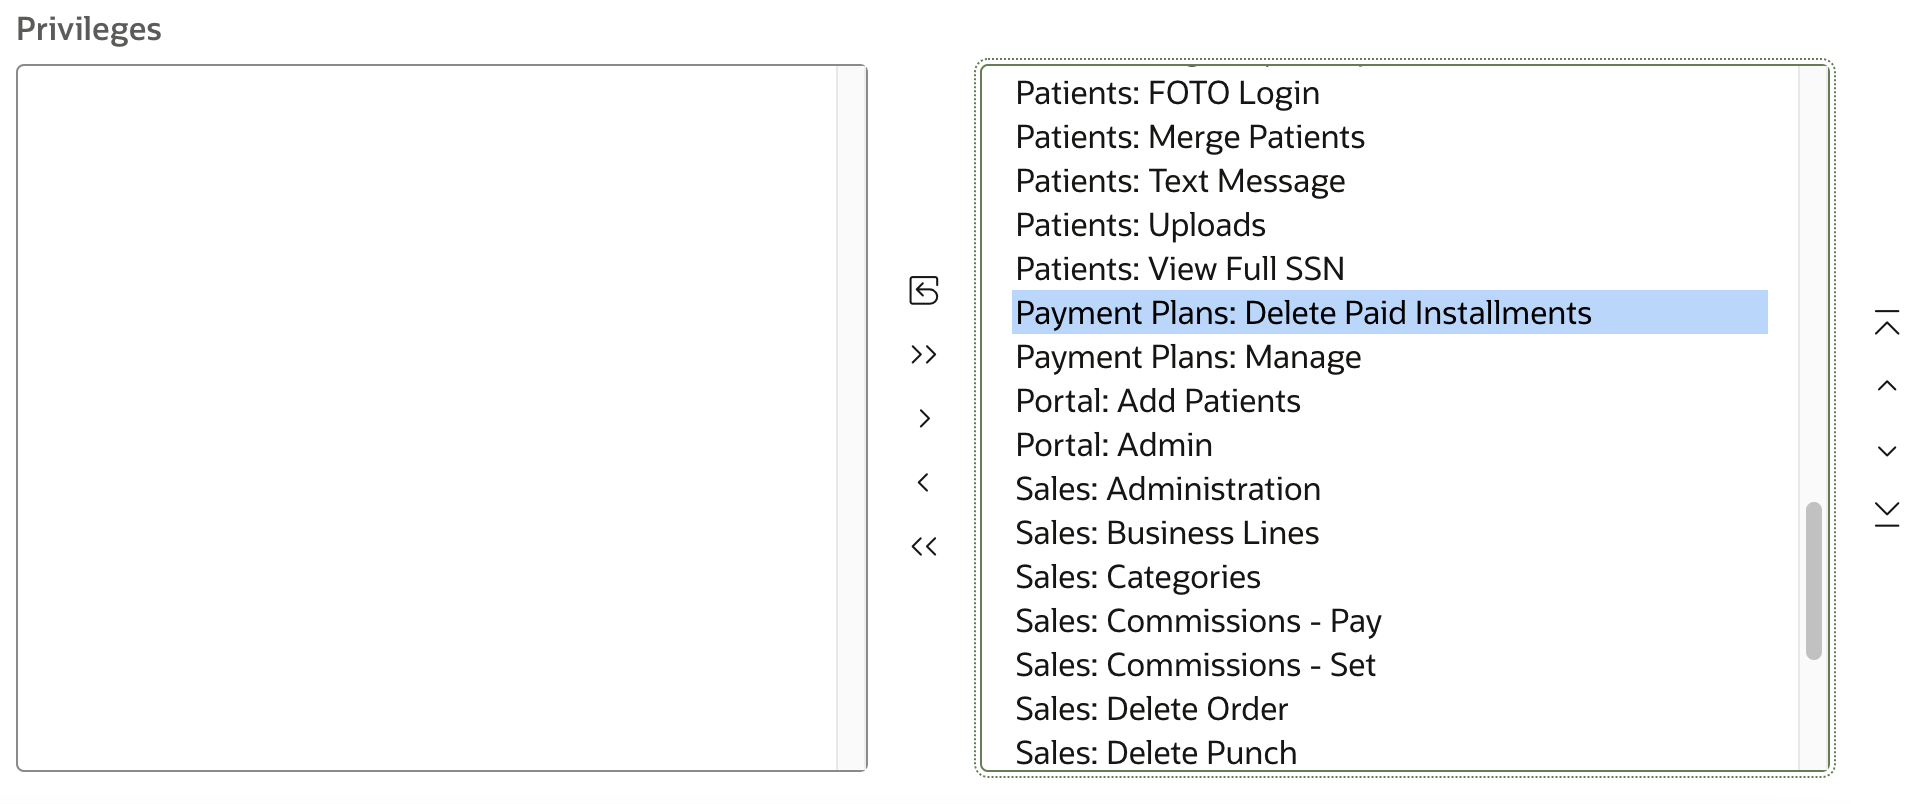
NEW FEATURE:
You now have the option delete completed payment plans. This feature will allow users with the “Delete Completed Installments” privilege to delete completed payments plans and either refund the patient or allocate the funds elsewhere.