
Creating Intake Forms
This article will teach you how to create an Intake Form. It is very similar to the Custom templates.
You will want to start in the Documentation Tab -> Template Builder

You can either add Intake Forms from the Library:

Or click New in the upper right hand side of the page

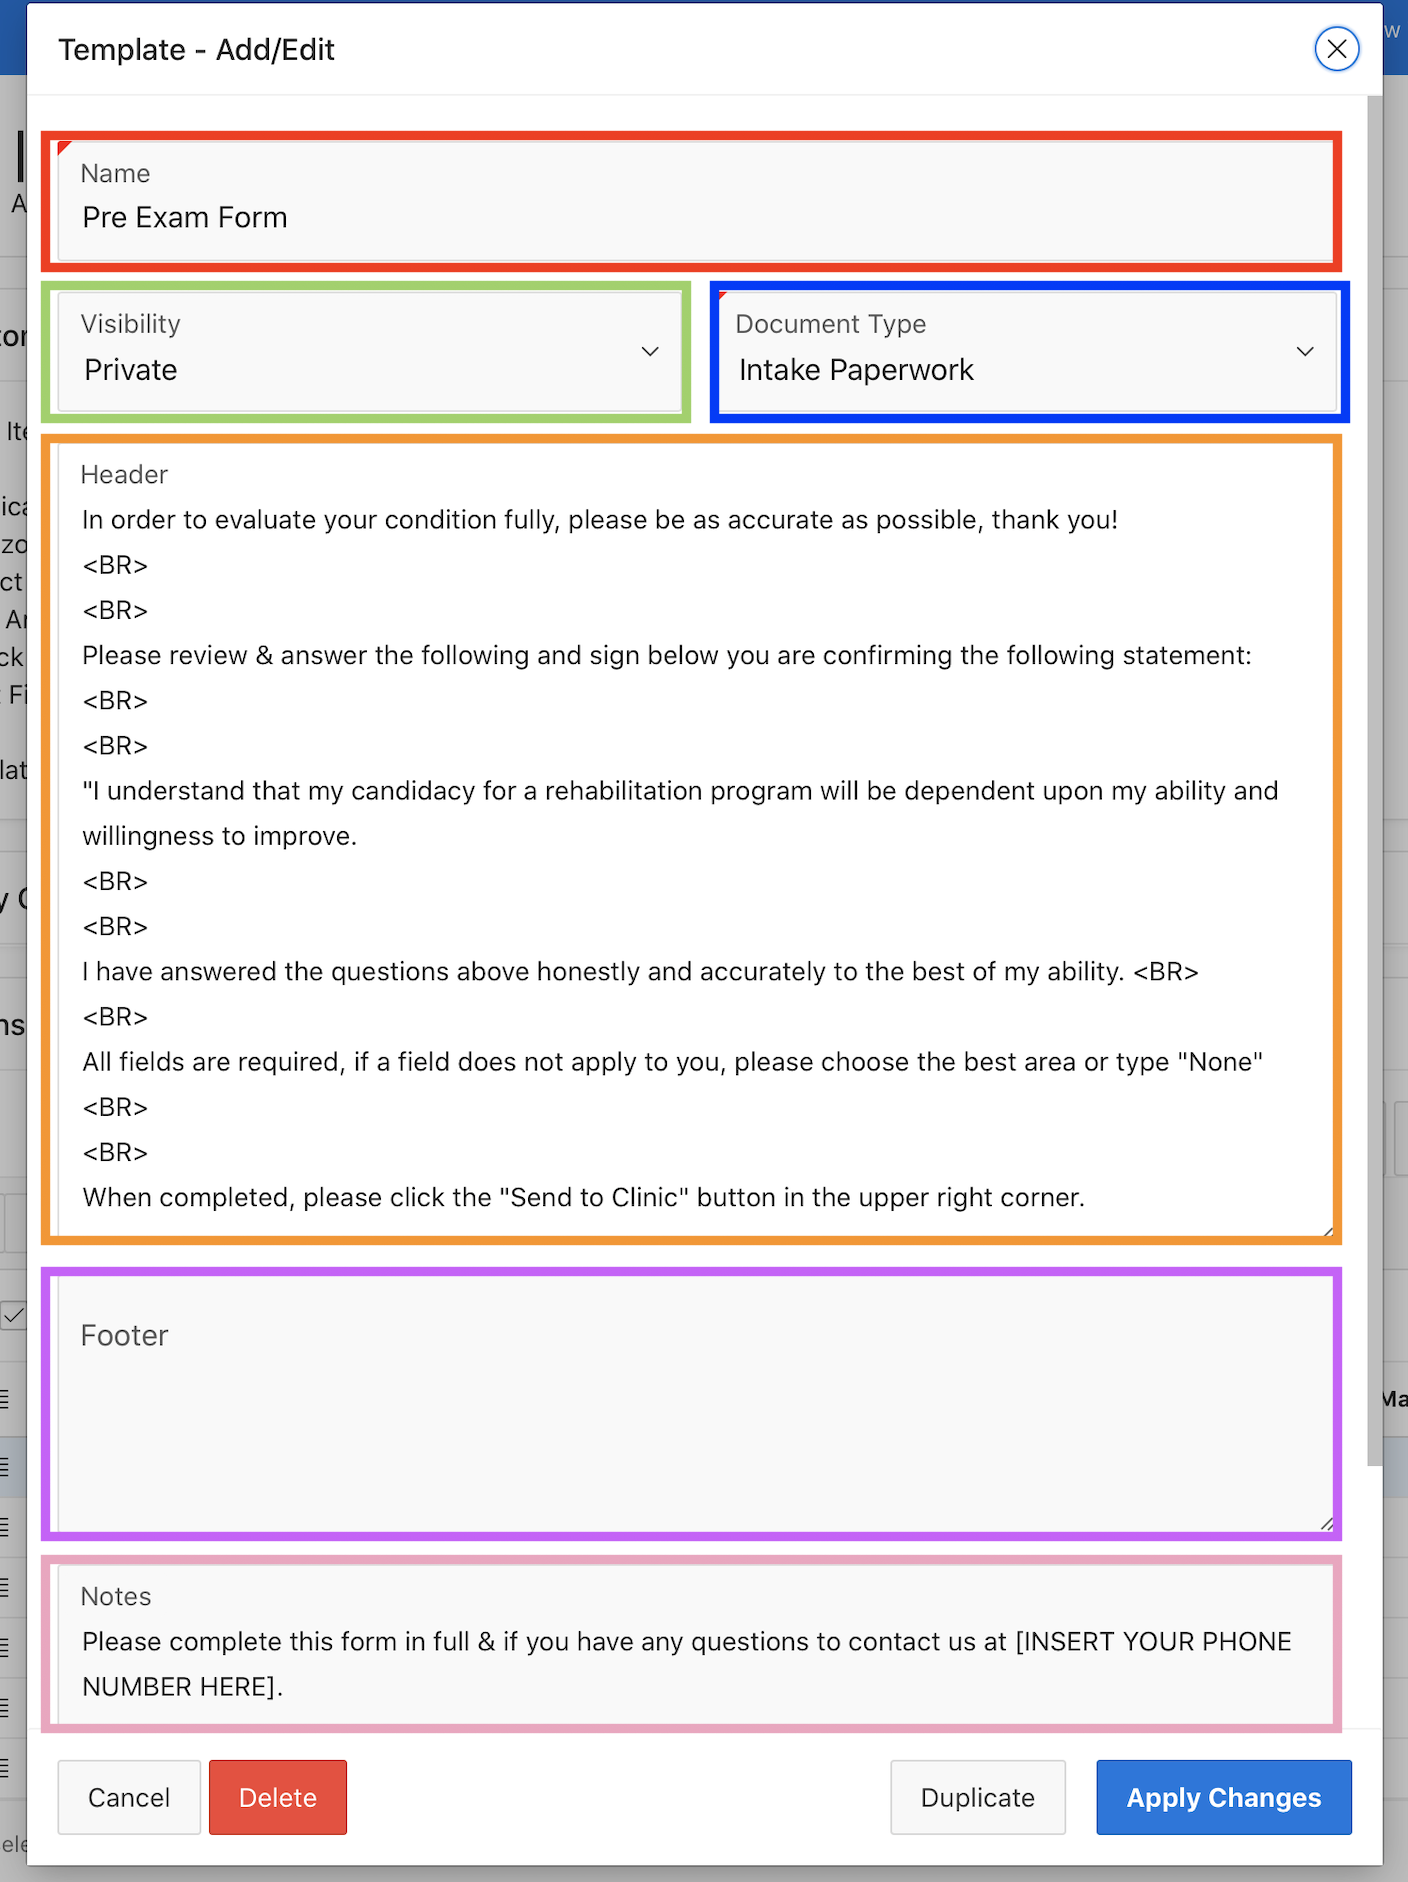
Fill in the following information and Click Create & Add Questions:
- Red: Name - Name the template you are creating
- Blue: Document Type - Select Intake Form
- Green: Visibility - Select if this if Private: Just this user or Public: Full office
- Orange: Header - This will display at the top of the document when the patient is filling out the form. Great area for instructions for the patient. To add a new paragraph please use the <BR> in the example below to create the enter/return action on a keyboard
- Purple: Footer - This will display at the bottom of the document when the patient is filling out the form
- Pink: Notes - This will display before the patient starts the document. Great place for instructions on how to get ahold of the practice if they have questions.
You will have the option of adding 6 different types of questions to the custom template:
- 20 Vertical Radios (Multiple Choice)

- 20 Horizontal Radios (Multiple Choice)

- 61 Select Lists (Drop-down)

- 41 Text Areas (Large text field) - 4000 Character Limits - This is the only one that will allow Mapping into the Evals

- 61 Check Boxes (Multiple select choices)

- 50 Text Fields (Small text field) - 4000 Character Limits

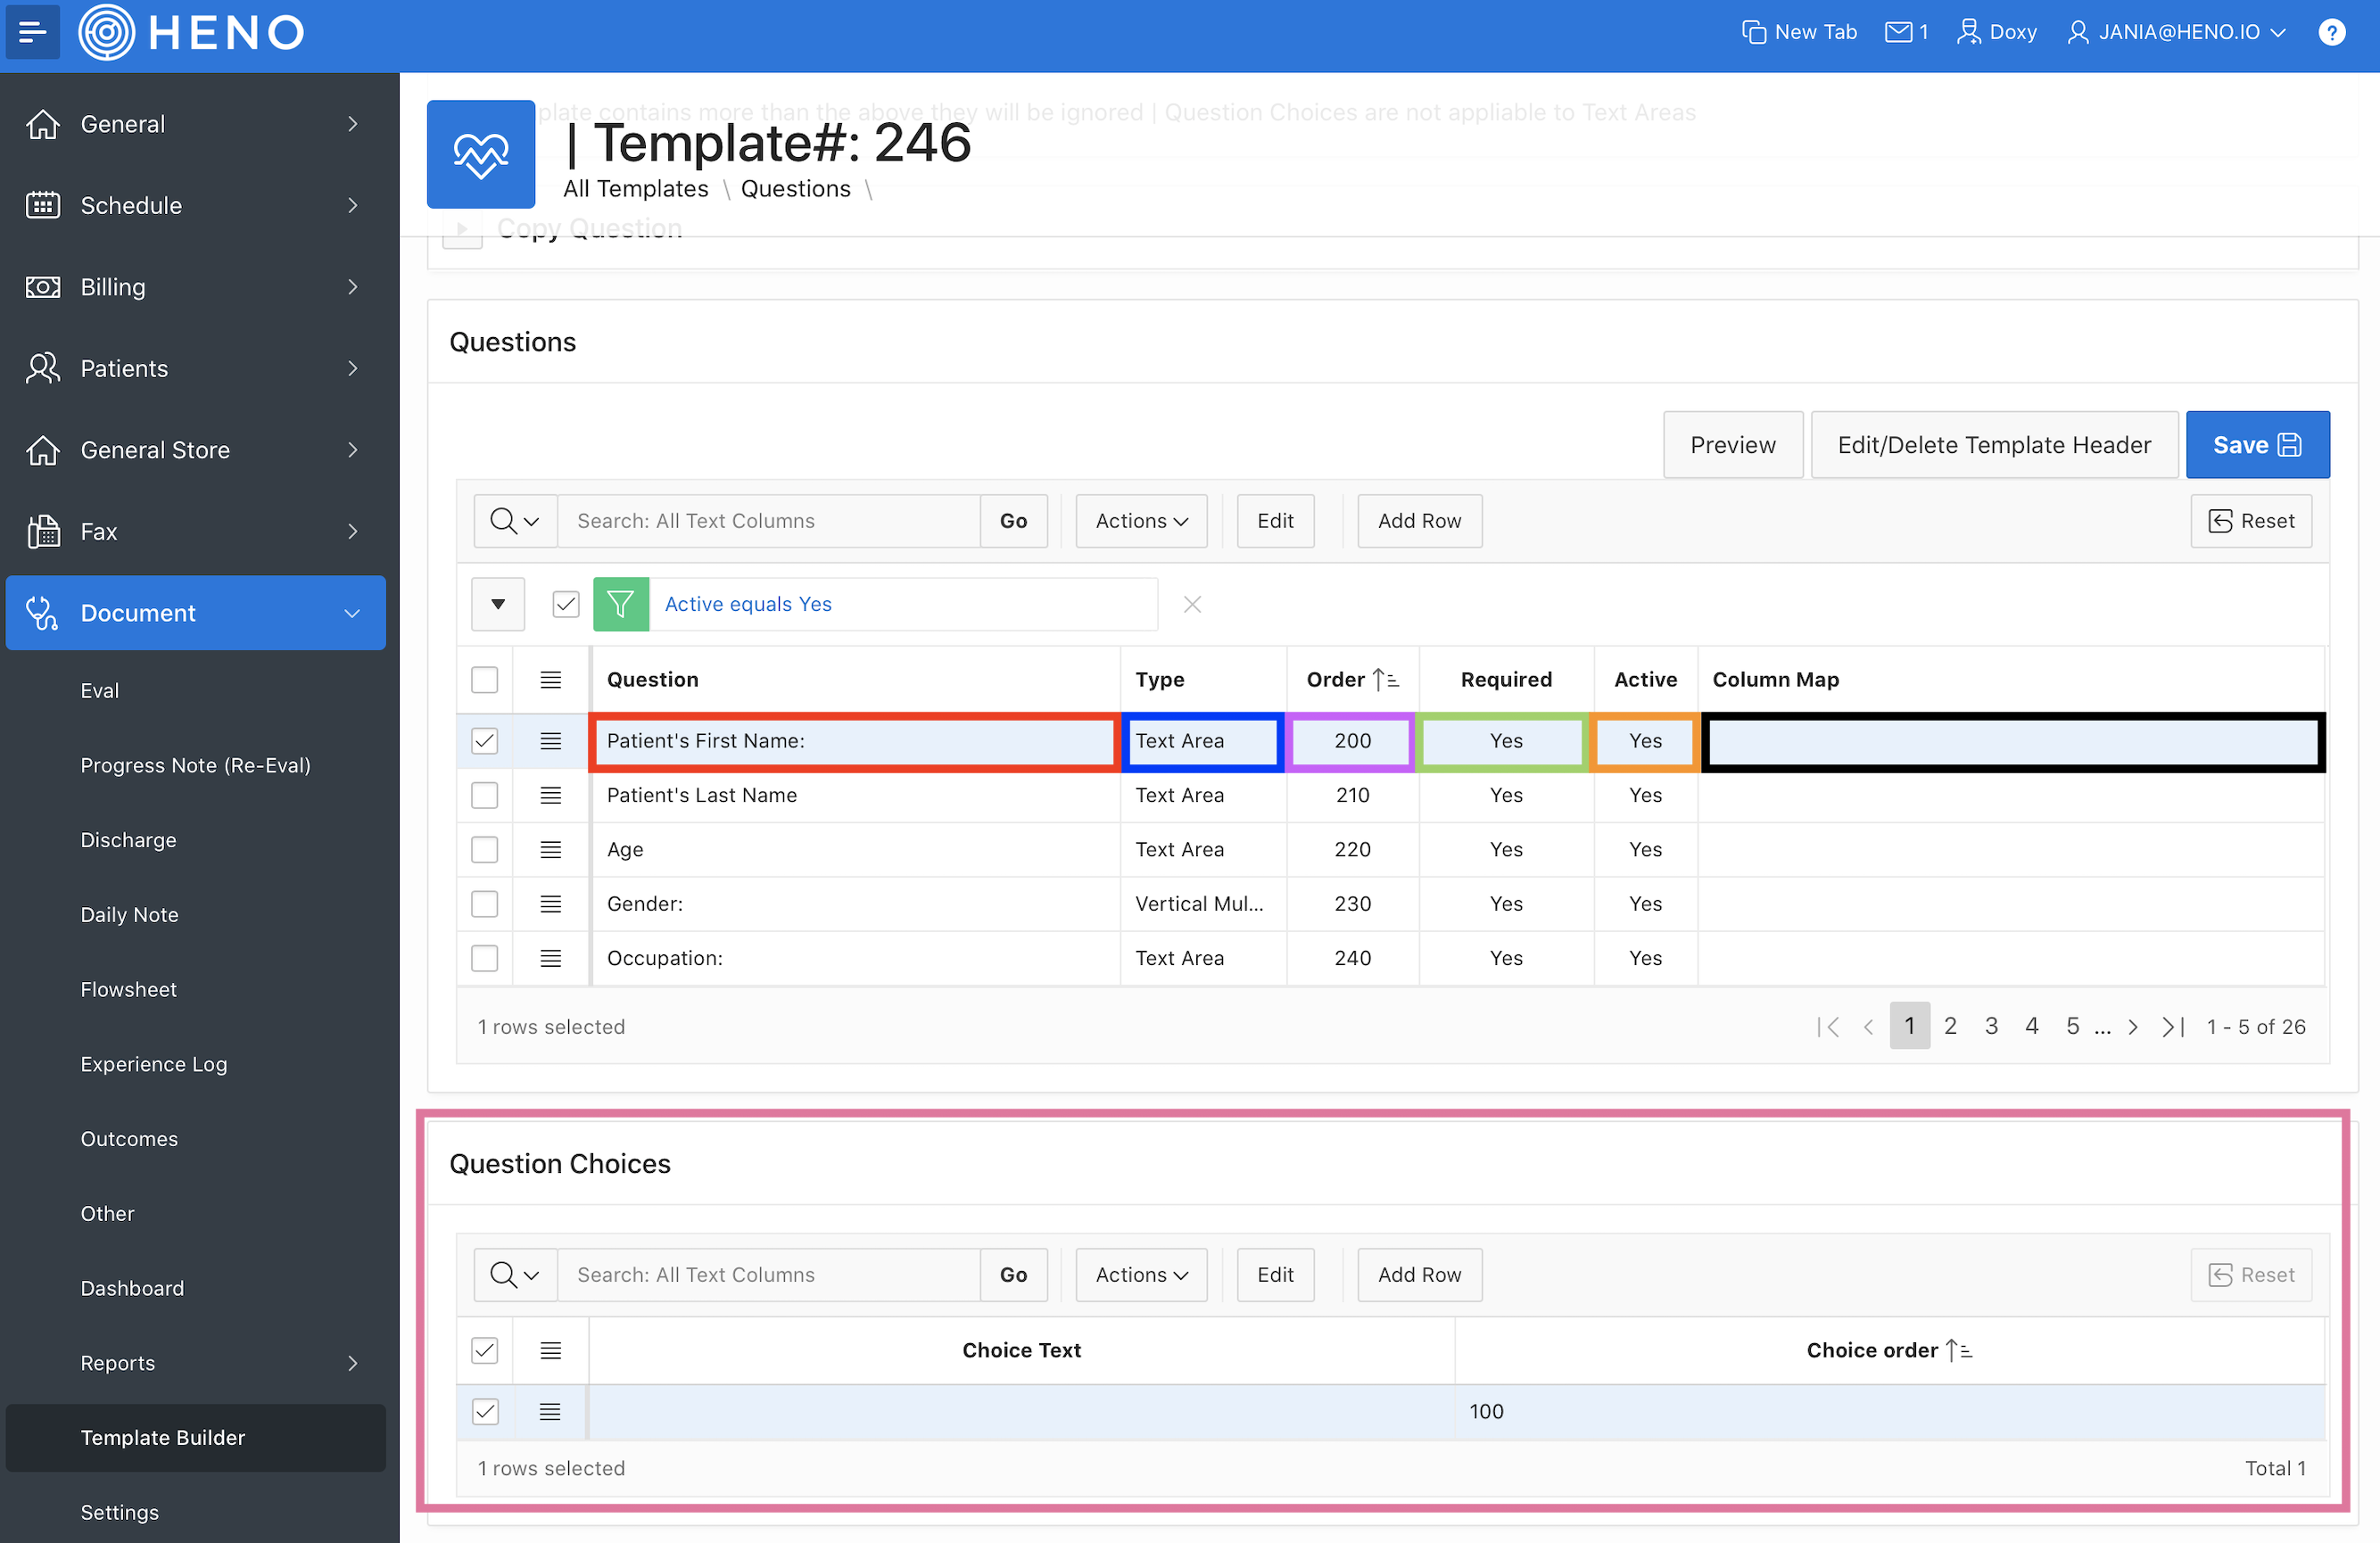
You will be able to use the Question fields to start filling out information:
- Red: Question - Double click on the field to open up the text box and update the question (4000 character limit)
- Blue: Type - The type of question you want to use for the template
- Purple: Order - This will need to increase in increments of ten (10). This will dictate where the question is on the template and the final PDF
- Green: Required - You will be able to me this question required to fill out before approving the note
- Orange: Active - If you are no longer needing this question, you can mark it inactive to remove it from future templates
- Black: Column Mapping - This will map ten (10) fields into the Evaluation.
- Pink: Question Choice - If you are using a question that allows a selection, you will be able to add the choice here. Same as the questions, you can dictate how the answers will display using the increments of ten (10) in the order.
The Fields that will map into the evaluation are:
**Please note: Only Text Area option will be able to use the mapping listed below
- Subjective
- Past Medical and Surgical History
- Prior Level of Function
- Medication
- Pain Duration
- Pain Location
- Objective
- Assessment
- Plan
- Short Term Goals
- Long Terms Goals
- 20 Separate Flex Fields


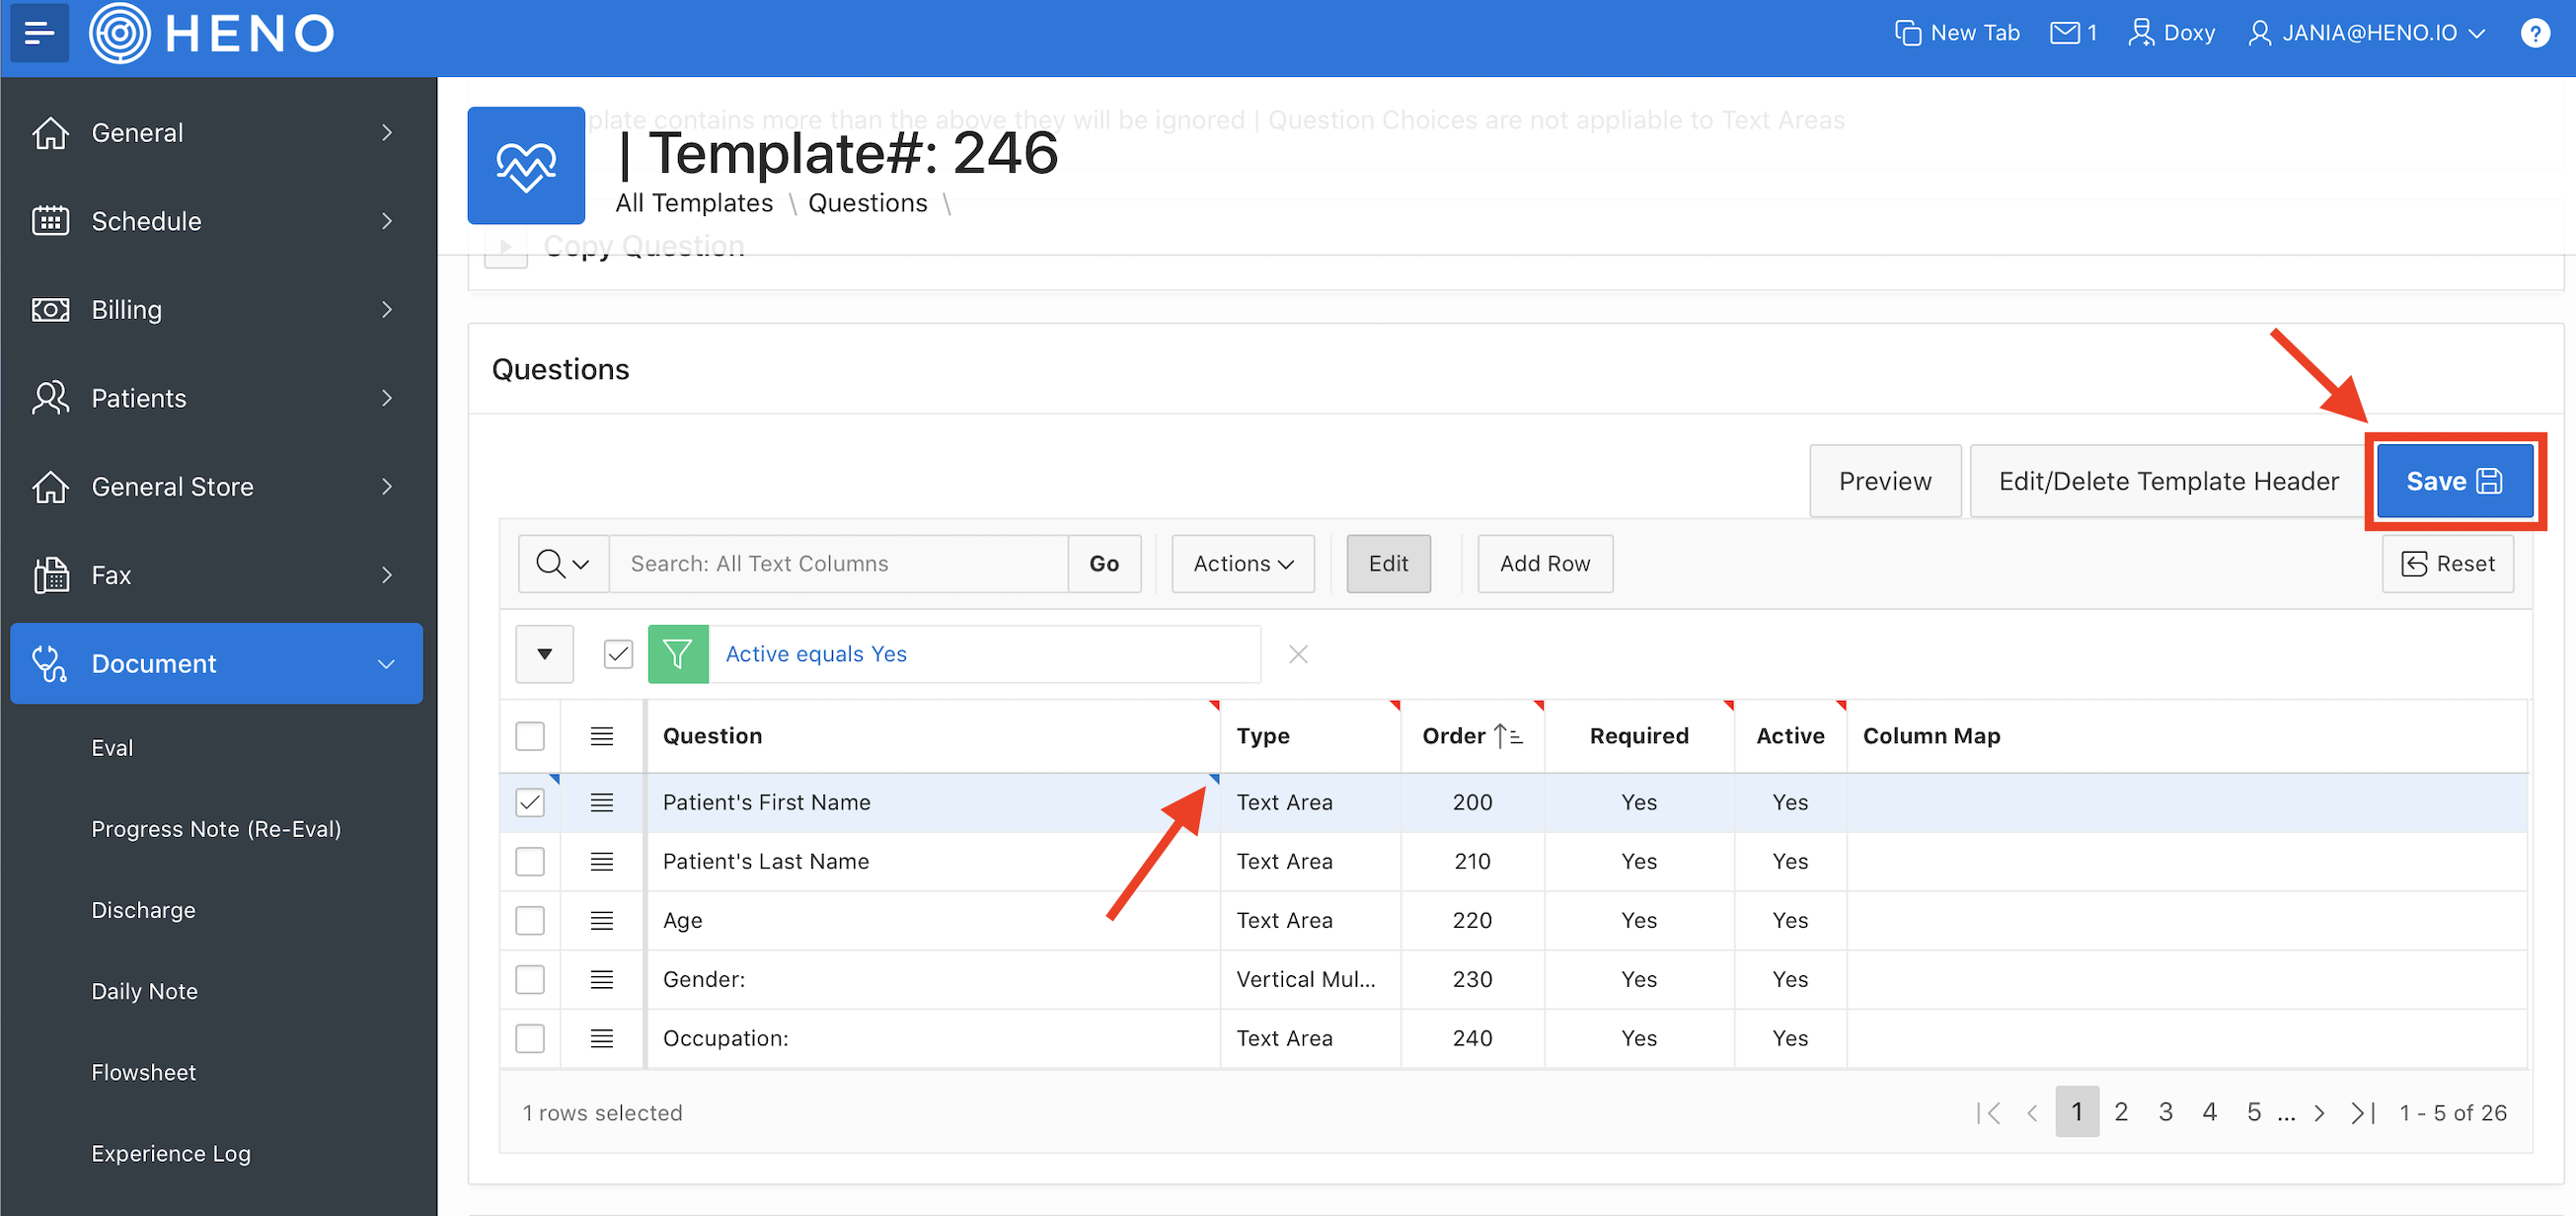
When Editing the information, you will start to see blue triangles in the top right corners. This means this field has not been save. Be sure to click the Save button at the top:
If you would like to edit the design of the PDF for the intake form in the font format, click on the Row actions in front of the question and Select Single Row View:

Click Edit and Start entering information

Type in your Question. This field has 4000 characters available and will wrap the text on all question types. See example below.
- Example:

Choose the order of your Question
Choose the type of your Question
Choose if this question is Required

Choose if this question is active

Choose the Column Mapping

Choose if you want your Question underlined on the PDF
Choose if you want your Question Bold on the PDF
Choose if you want your Question in Italics on the PDF
Choose if you want your Answer underlined on the PDF
Choose if you want your Answer Bold on the PDF
Choose if you want your Answer in Italics on the PDF
Choose your Font Size
Choose if you want the Questions to Print on a New line
Choose if you want the Question to Print if there is no Answer
Choose if you want the question to populate on the PDF (Final version)
Choose if you want the Answer to Print on the Next Line
Choose if you want the Question to have an Answer Line and How Long you want it to be
Once 1 questions is created you can copy it up to 30 times. It is going to copy over the Question, Type of Question, and Question Choices created for that question. Once copied, you no longer have to click the Add Row button. You can just go in and customize each question to what you want.
If you want to see more Rows Per Page as you are build your template, click on the action menu at the top of the question area and Select Format -> Rows per Page
