
Set Up General Store Punch Card
In this Article
In this article, you will learn how to create a punch card within the General Store, and how to apply it to a patient that has purchased a punch card.
- 1
-
Create item in the General Store
To create punch cards, you will need to go to the general store and create a service/product that will require tracking the times a patient uses the service/product. In this article, we will go over how to create punch-card using a self-pay therapy package as an example.
You can access the General Store for a patient from the scheduler (Pink Box)
 Once in the general store, you can either create an order or create a new item. To create your new item, you will first make sure you have the appropriate business line and category for the item.
To create a Self-Pay Therapy package:
- Purple Box: Click on the Business Lines tab
- Pink Box: Now click create
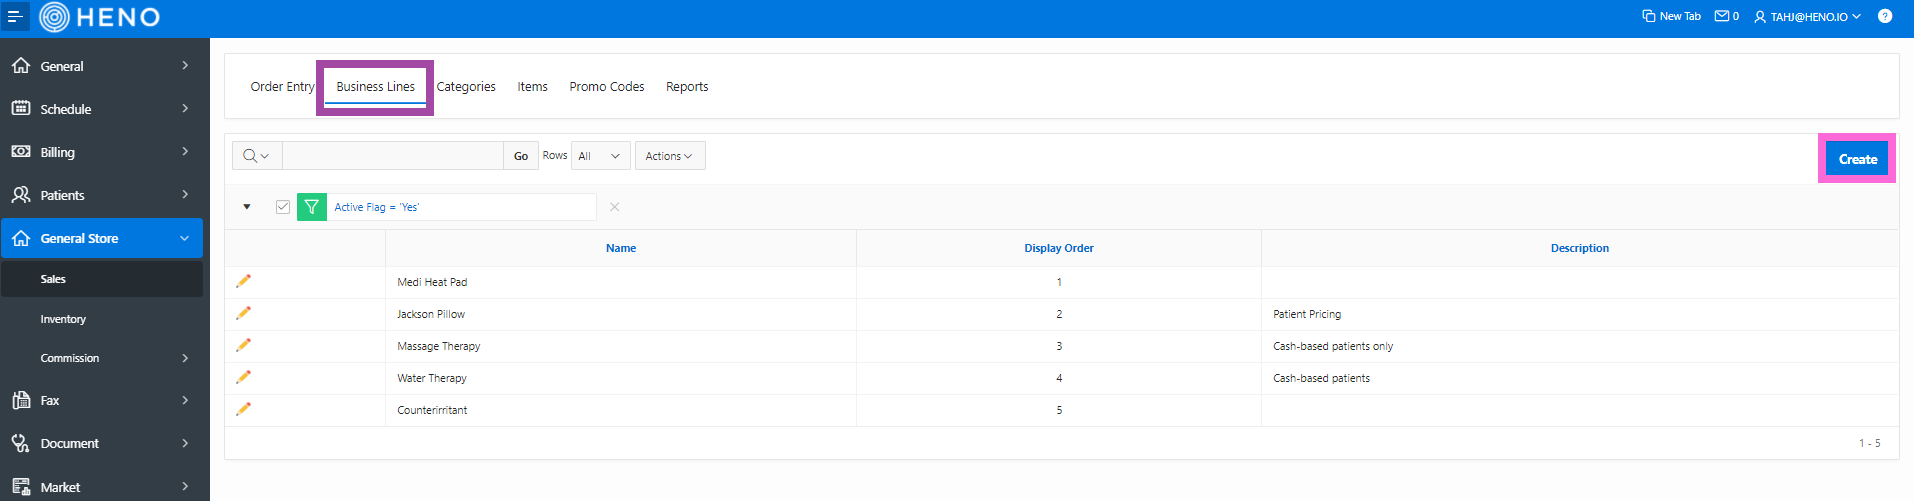
Now let's create the Category for the Self-Pay line of business.
- Name the package
- Select Self-Pay as the Line of Business
- Now add the description of the package
- Click Create (pink box)

Once you have your category, you can create your item in the Items Tab (blue box) then click Create (pink box)

To create the punch card:
- Green Box: You must enter a value in the Punches box
- Purple Box: Click create.

- 2
-
Create an order in the General Store
You got your item created, now you're ready to create your order. Just click the General Store section then click Create Order.

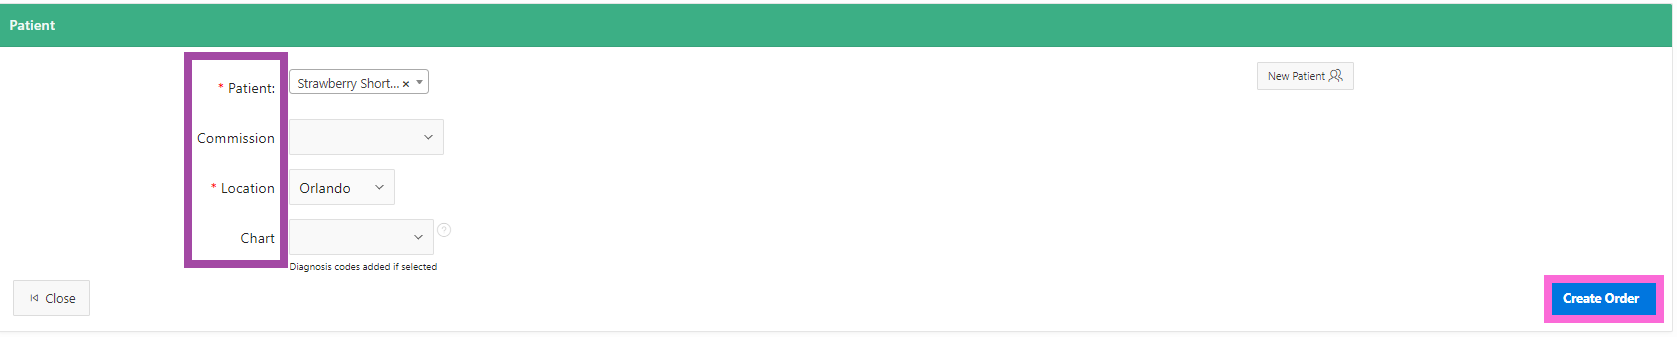
- Purple Box
- Select the patient *Required
- Select who get the commission (if there is any)
- Select the location that this order is being made *Required
- Select the chart (if any)
- Click Create Order (pink box)
Once you have selected Create Order, you will now be able to add your Self-Pay package (purple box)

Now select the type of package
 Then select the pack (orange box) that the patient will be purchasing

Now time to select the quantity (red box) then click Add to Order (light green box).
 Now that you have selected the quantity, you're going to click the Back button (purple box)
*Please Note: You must press the Back button twice to get to the list of LOB screen
 On the left-hand side of the screen you'll be able to see a order summary of the item(s) with the quantity you selected (blue box). Also, you will be able to see the grand total of everything.
If you need to change the quantity of the, click on the item in the order summary (pink box)
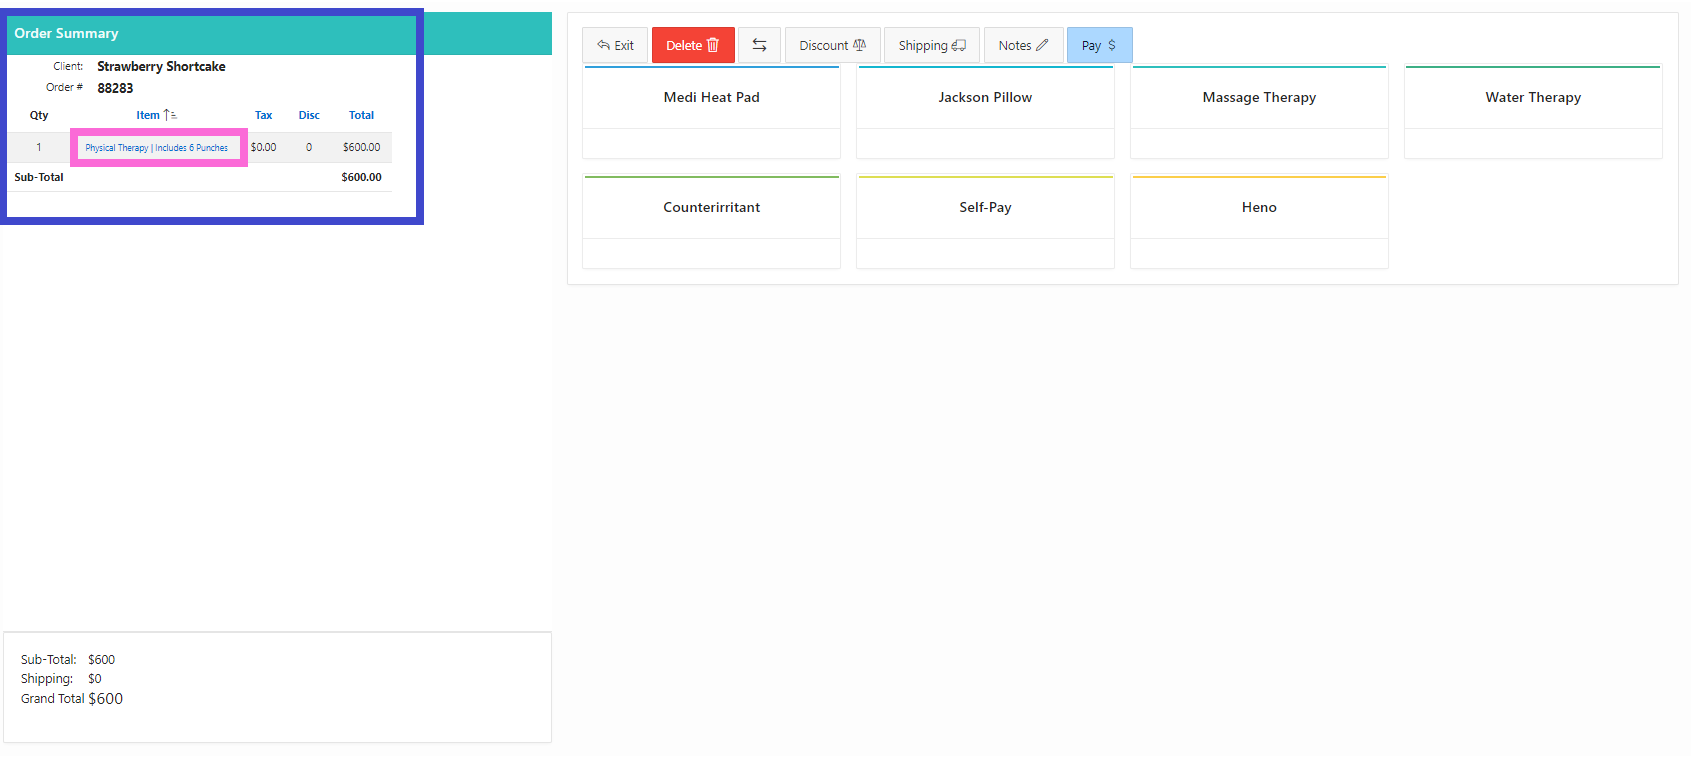
Click the Pay button (red box) to either close the the order without payment or take payment.
If you want/need to come back to it later, just click the Exit button (light green box)

- Orange Box: Close the order without payment if you plan to take payment later
- Black Box: If you are ready to take payment, you can either do a Manual Payment Entry (for partial payments or you can charge the card on file.

Once you choose your option, you will be able to see the receipt of the item.

To view closed orders with a balance(s), click the Closed With Balance bubble (purple box)
 Closed With Balance Report:
- Blue Box: View the order that has the balance
- Red Box: If you want to take the payment
- Orange Box: View the patient
- Green Box: If needed, click the pencil to edit/delete the order
 Once you have taken payment, you will be able to view the receipt. From the receipt you will be able to:
- Pink box: Delete the order
- Light Green Box: Download as a PDF file
- Purple Box: Email the receipt

Patient has now purchased your item and punch cards have been created
- 3
-
Applying and Checking Patient Punch Cards
There are two option to view and apply punches to your patients punch cards: 1) Schedule tab, or 2) Patient tab.
Patient tab
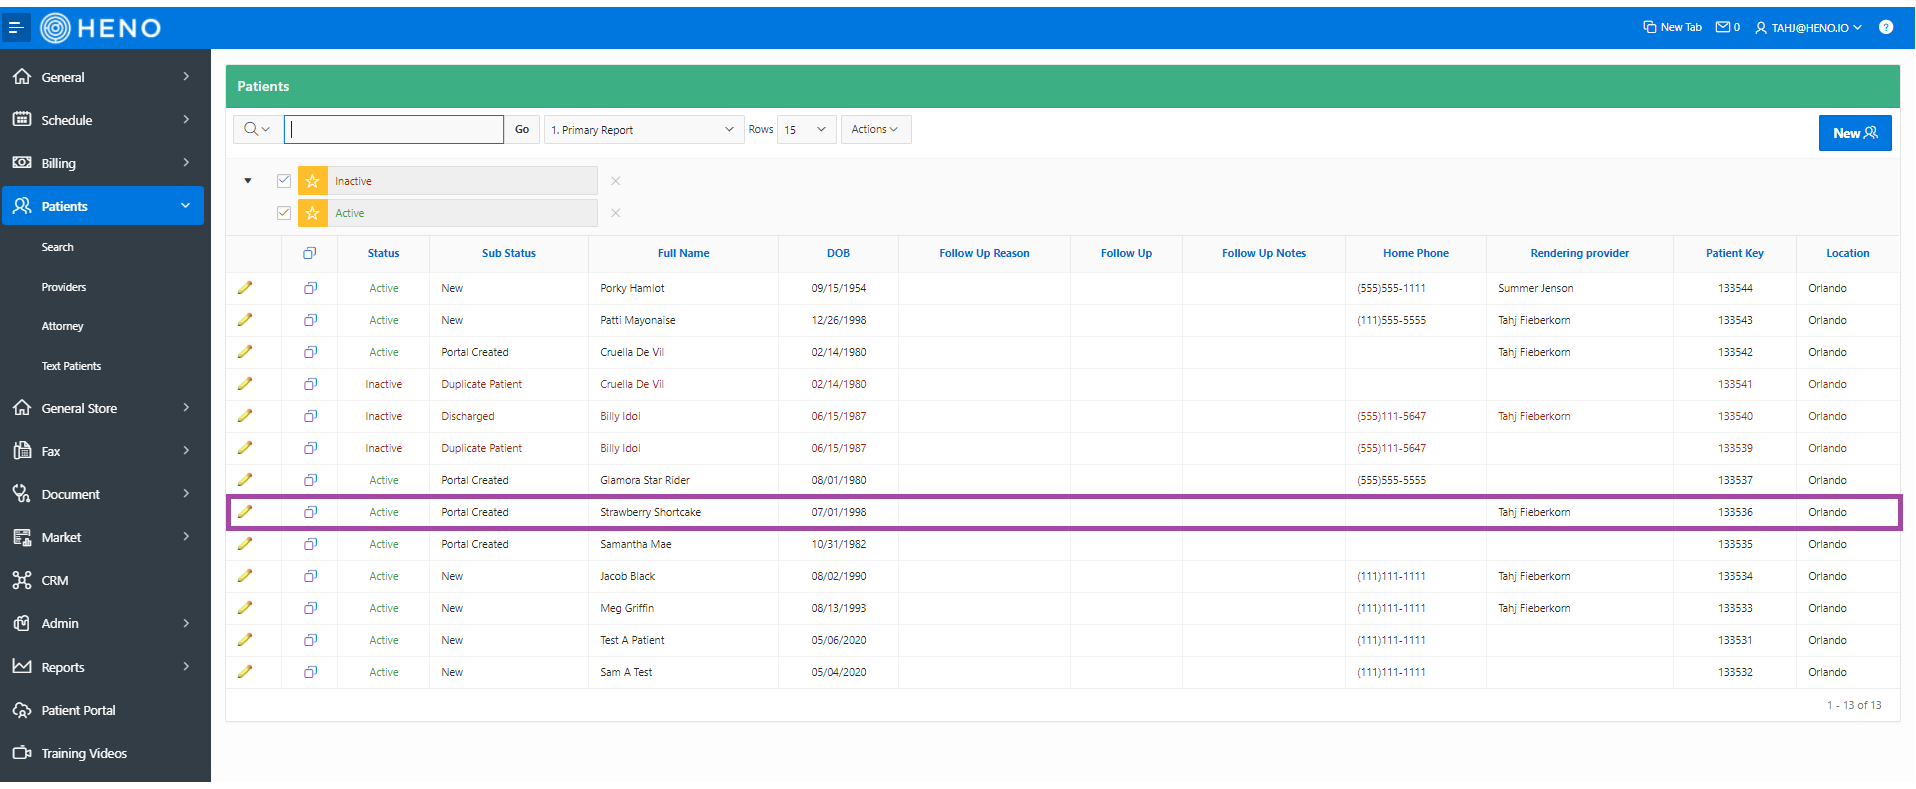
- Search for a patient that has purchased an item with a punch card. Click on the Edit pencil
- Select the punch card tab (light green box) to view all of the patients Punch Cards.
- Red Box: Click the pencil to edit the punch card
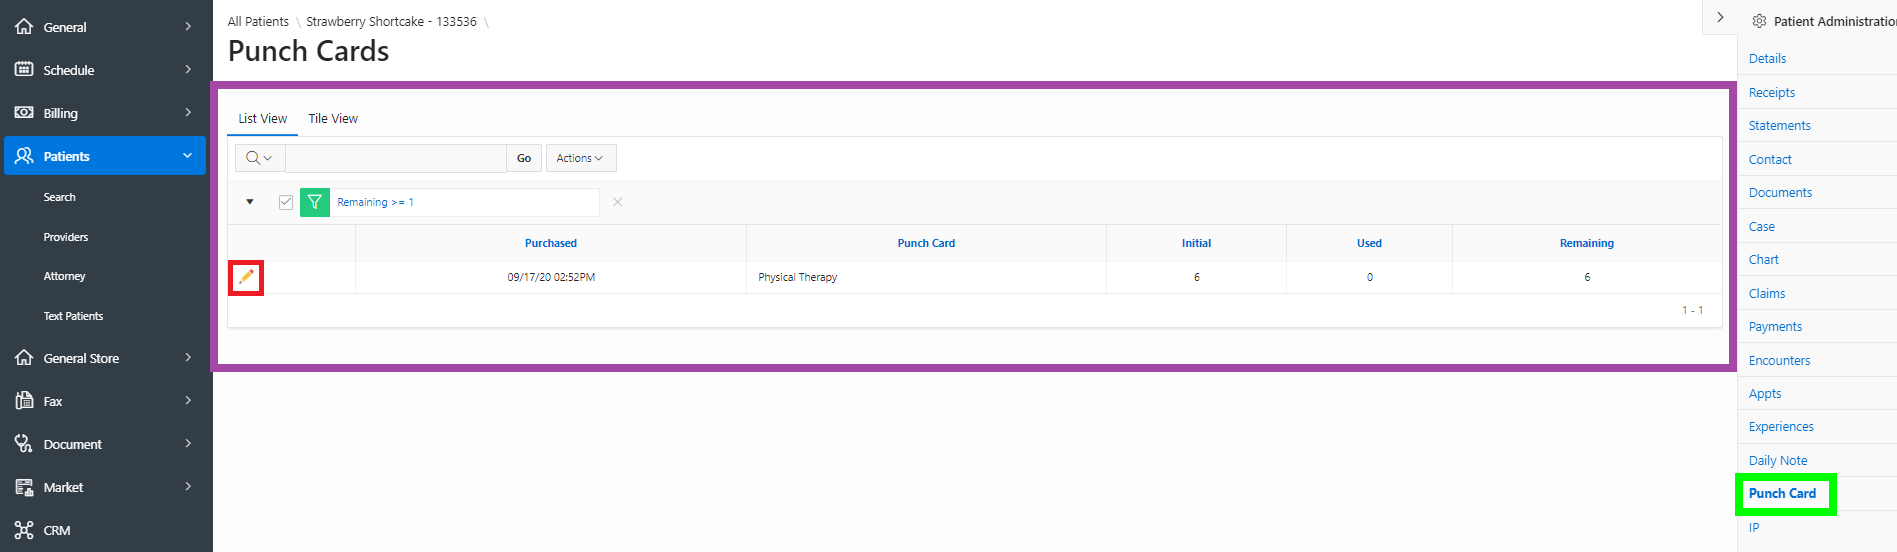
- Once you click the pencil, you will see all previous punches and the option to Punch Card Now.

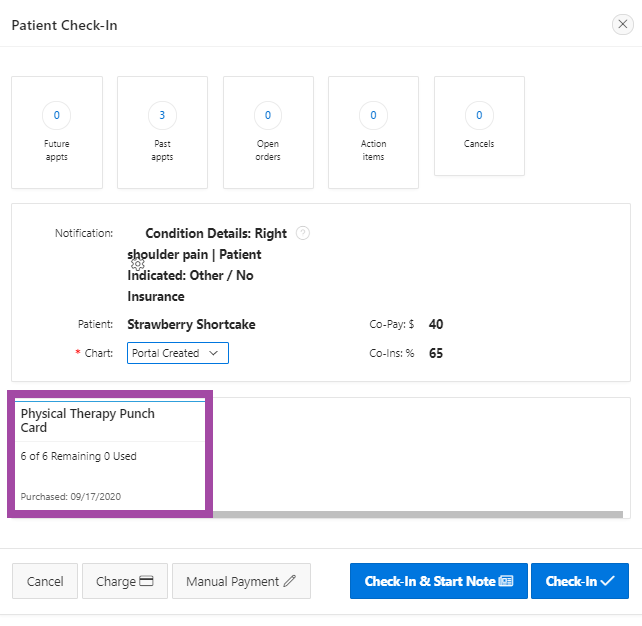
Schedule tab
- When you check-in patient, all punch cards for the patient will appear at the bottom of the pop-up window when once you click on check in. Click on the desired punch card, view previous punches, and punch card now.
- It is ideal to punch cards prior to checking the patient in for the appointment to keep track of punches and not forget to do it at the end when checking out the patient.
- It is ideal to punch cards prior to checking the patient in for the appointment to keep track of punches and not forget to do it at the end when checking out the patient.
*Please Note:It is recommended to create a slot type for patients that have punch cards, just to make it easy to identify patients with punch cards.
Check out the Creating Slot Types and Colors